A dedicated gallery page transforms your Shopify store from a simple storefront into a visual experience. It showcases your products in action, builds brand credibility, and offers social proof through real customer photos or styled shoots. Whether you're selling fashion, home decor, or handmade goods, a gallery page helps potential buyers imagine your products in their lives; boosting engagement, trust, and ultimately, conversions.
Start Creating Your Gallery Page
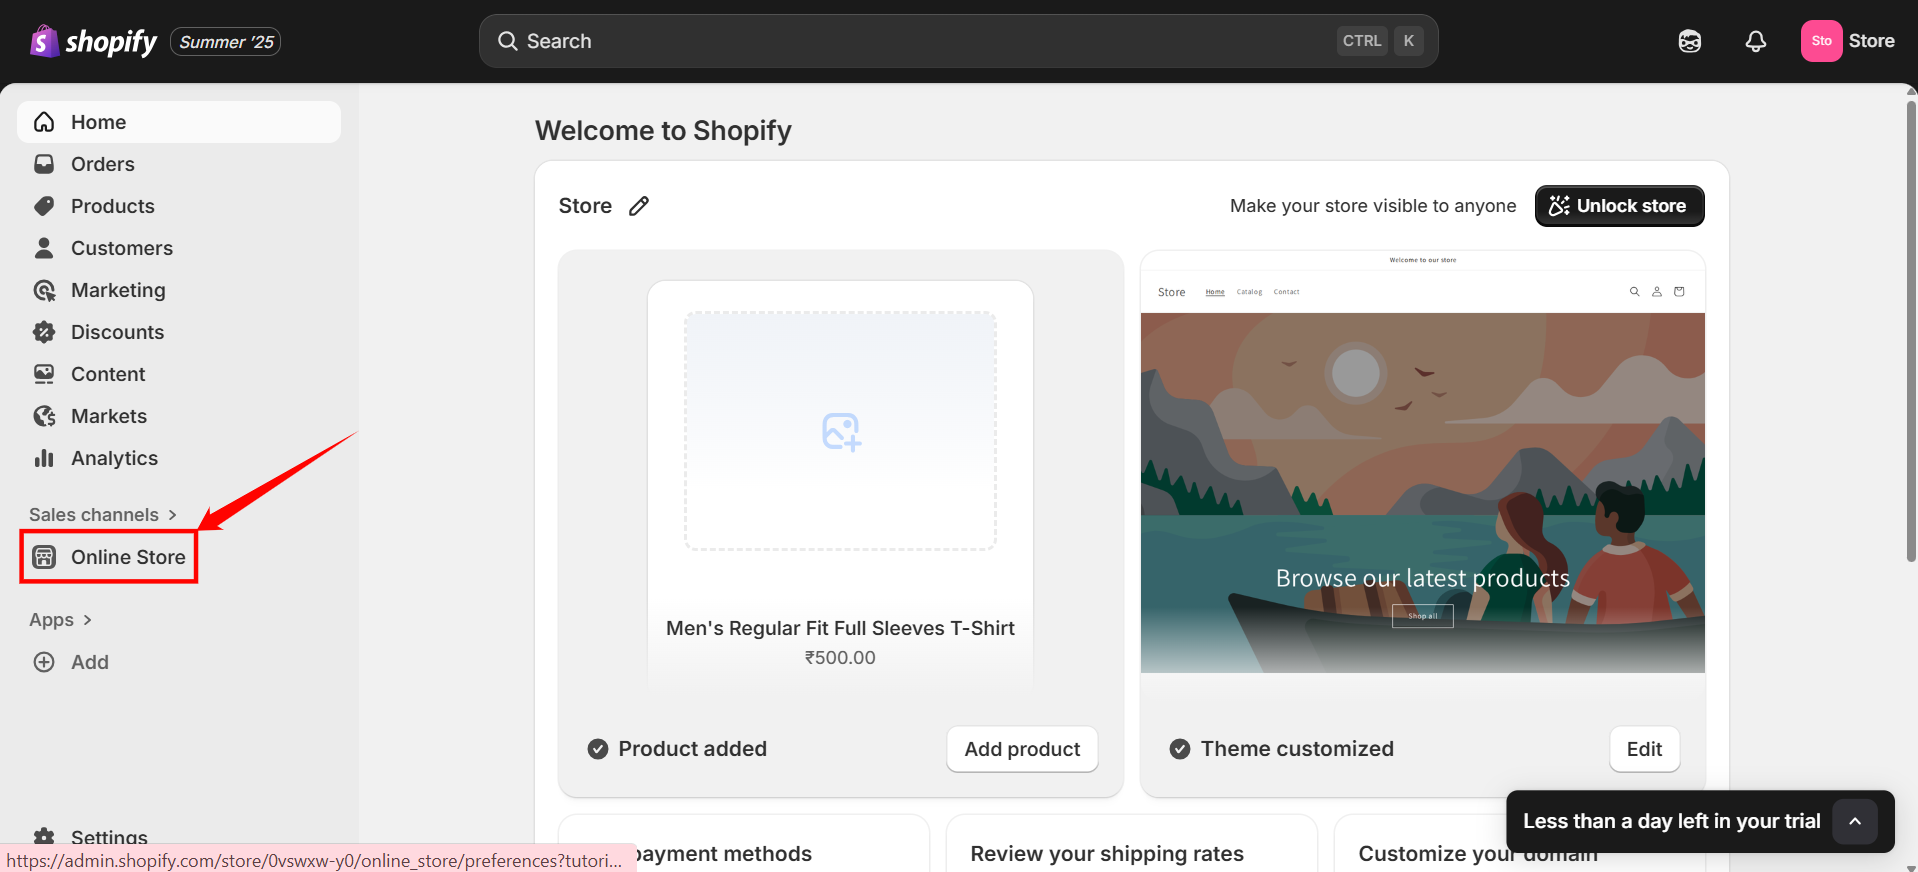
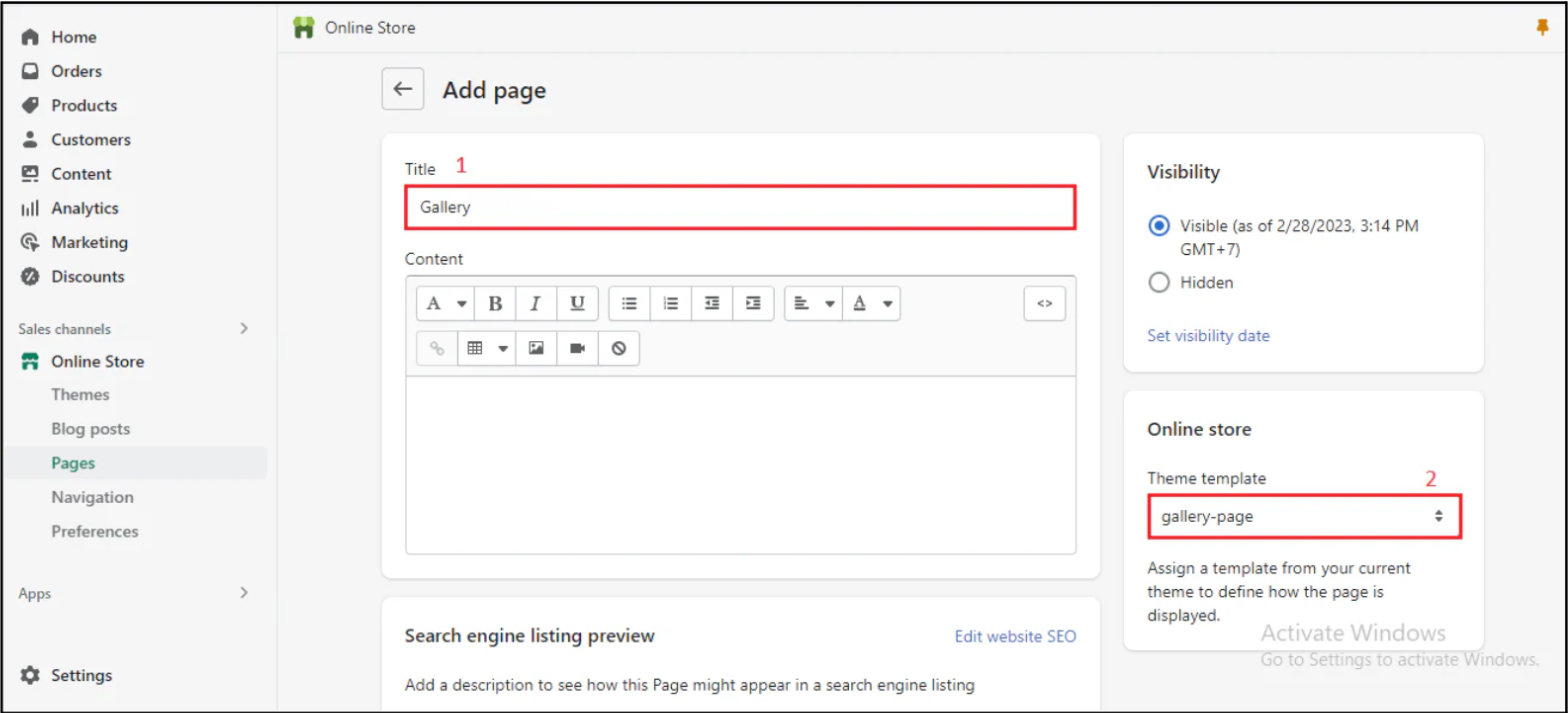
Step 1: Log into your Shopify account, click on the “Online Store” option in the left side bar.
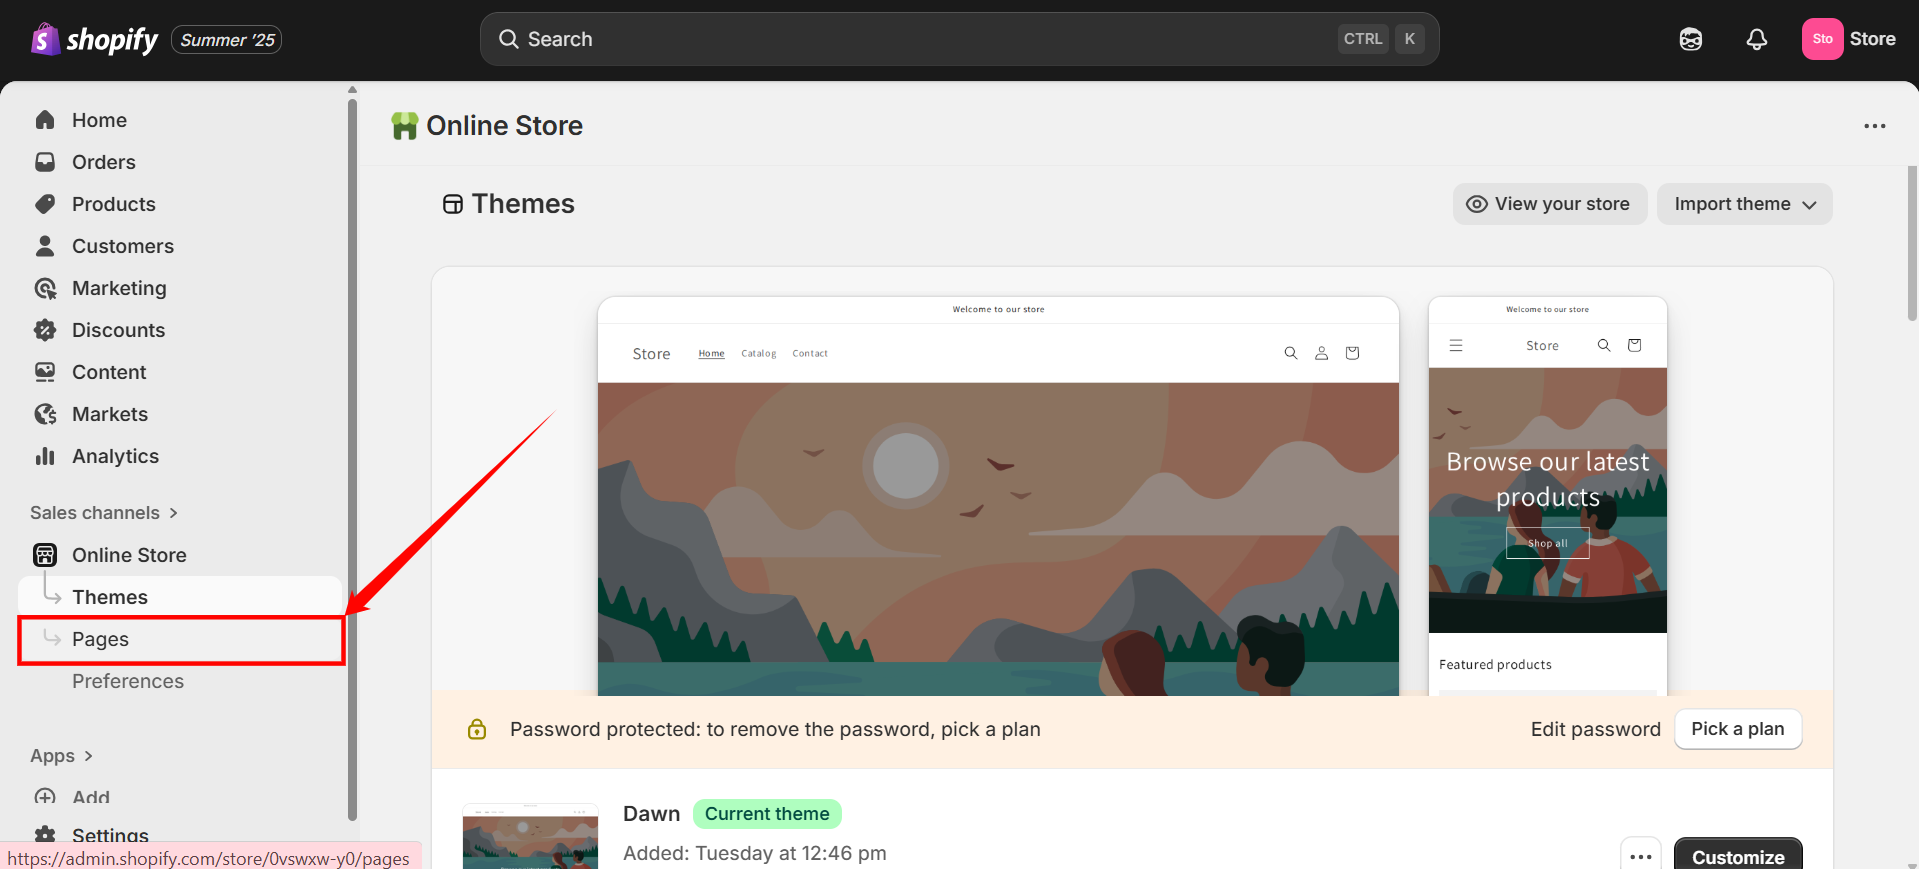
Step 2: Click on the “Pages” section to start building the Gallery.
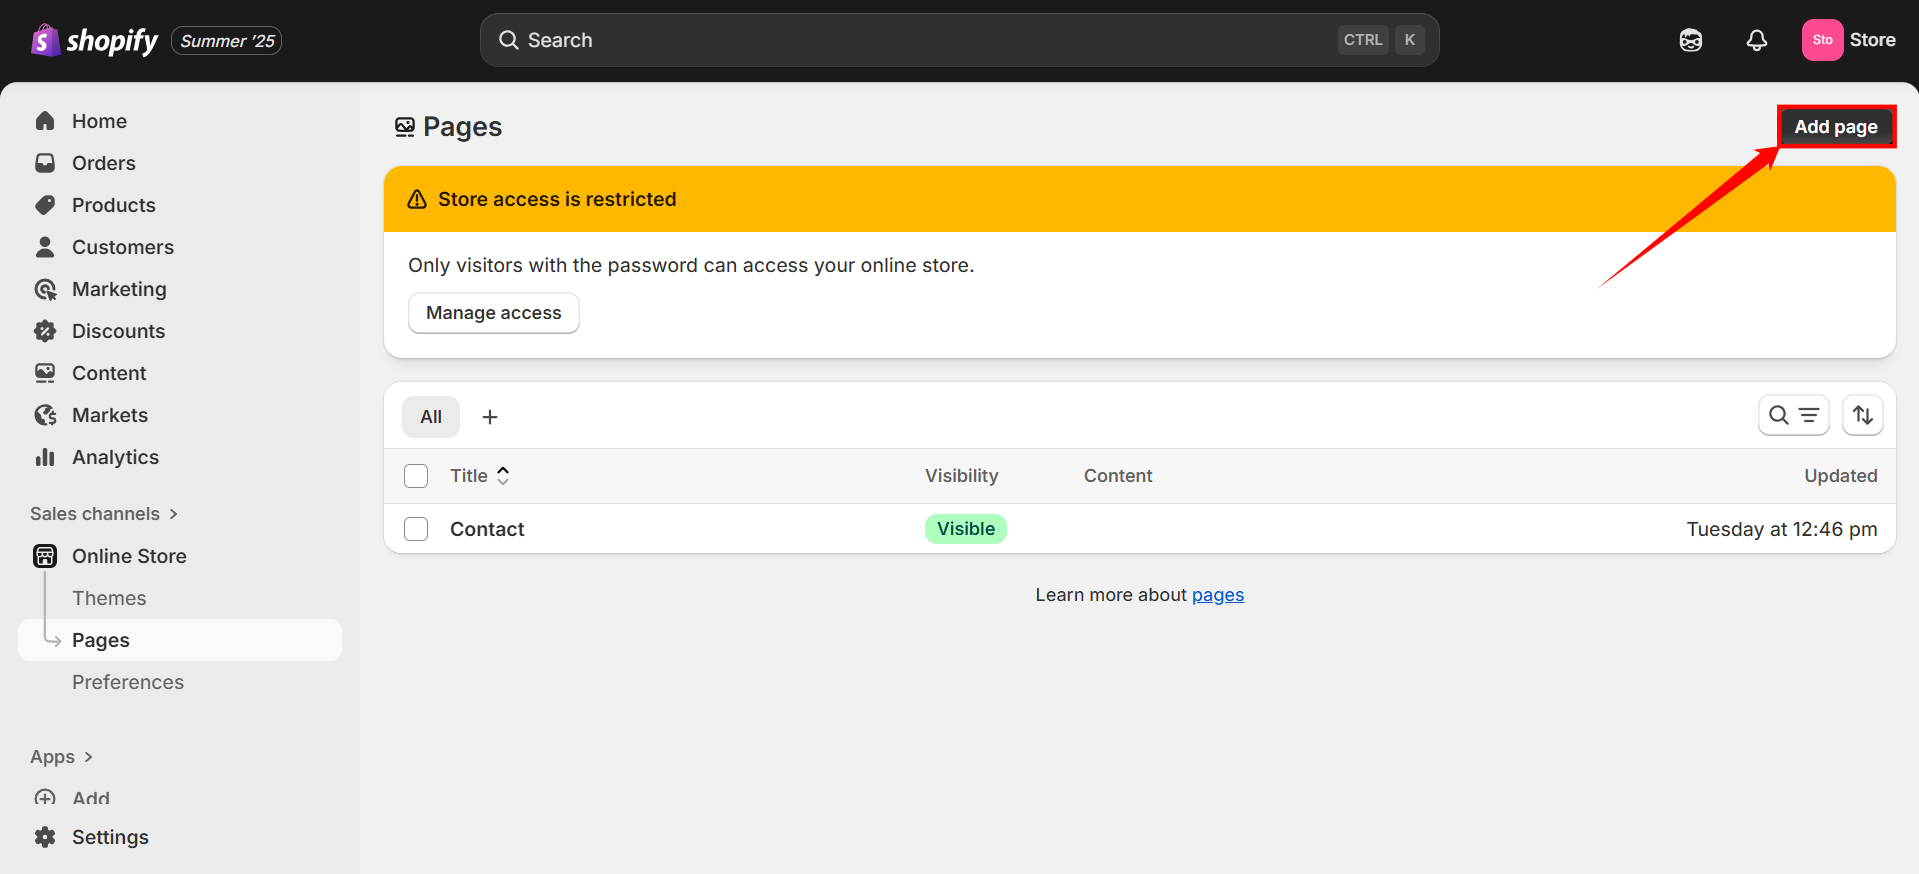
Step 3: Click on the “Add Page” icon at the top-right corner of the page.
Step 4: Name the page, and choose “Gallery-page” in the “Theme templates”.
Customize Gallery Page
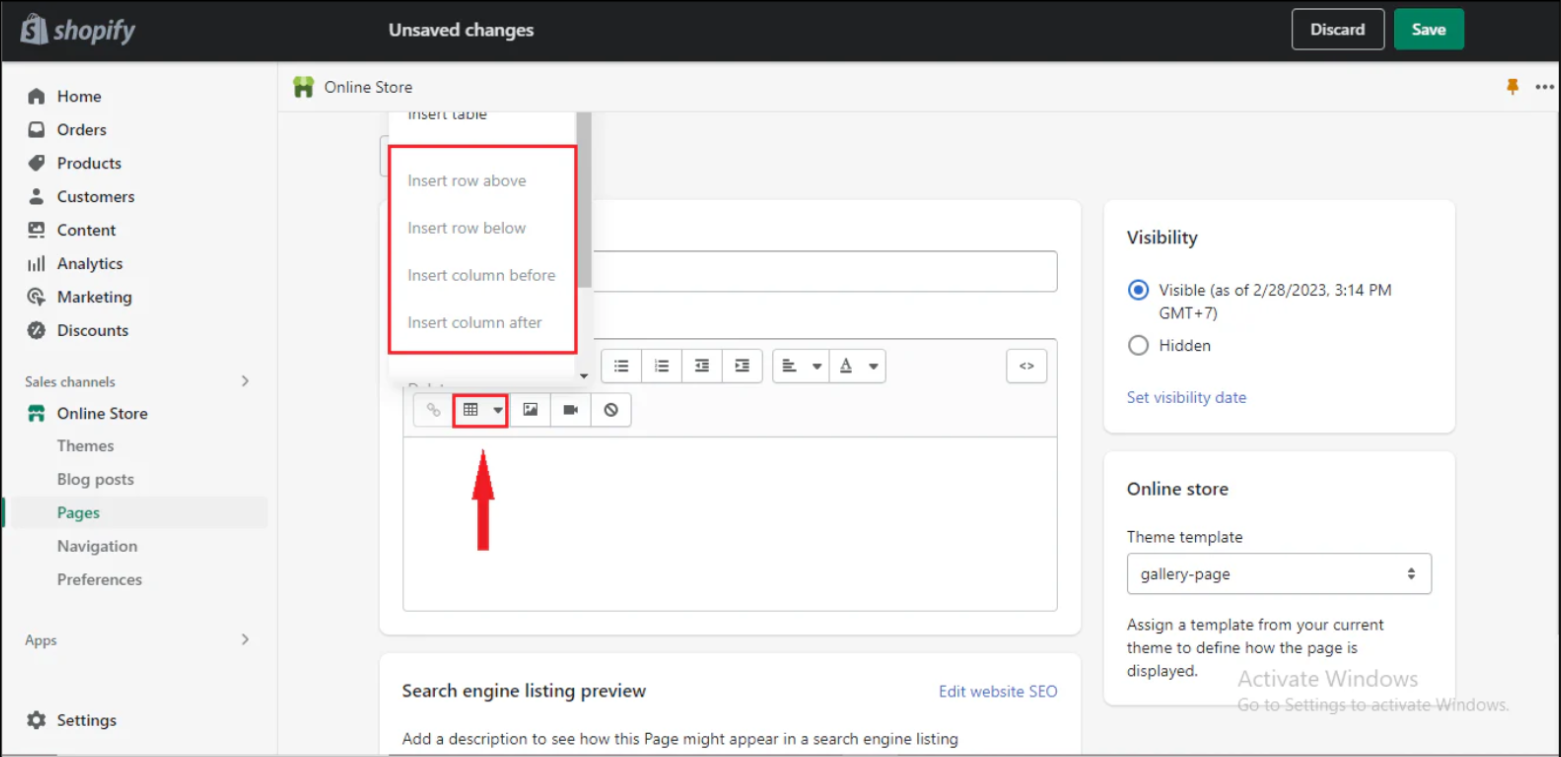
Step 1: Click on the table icon, then choose Insert table to add rows & columns to showcase your product images effectively. You can click Insert row below to add more rows, and Insert columns before to add more columns.
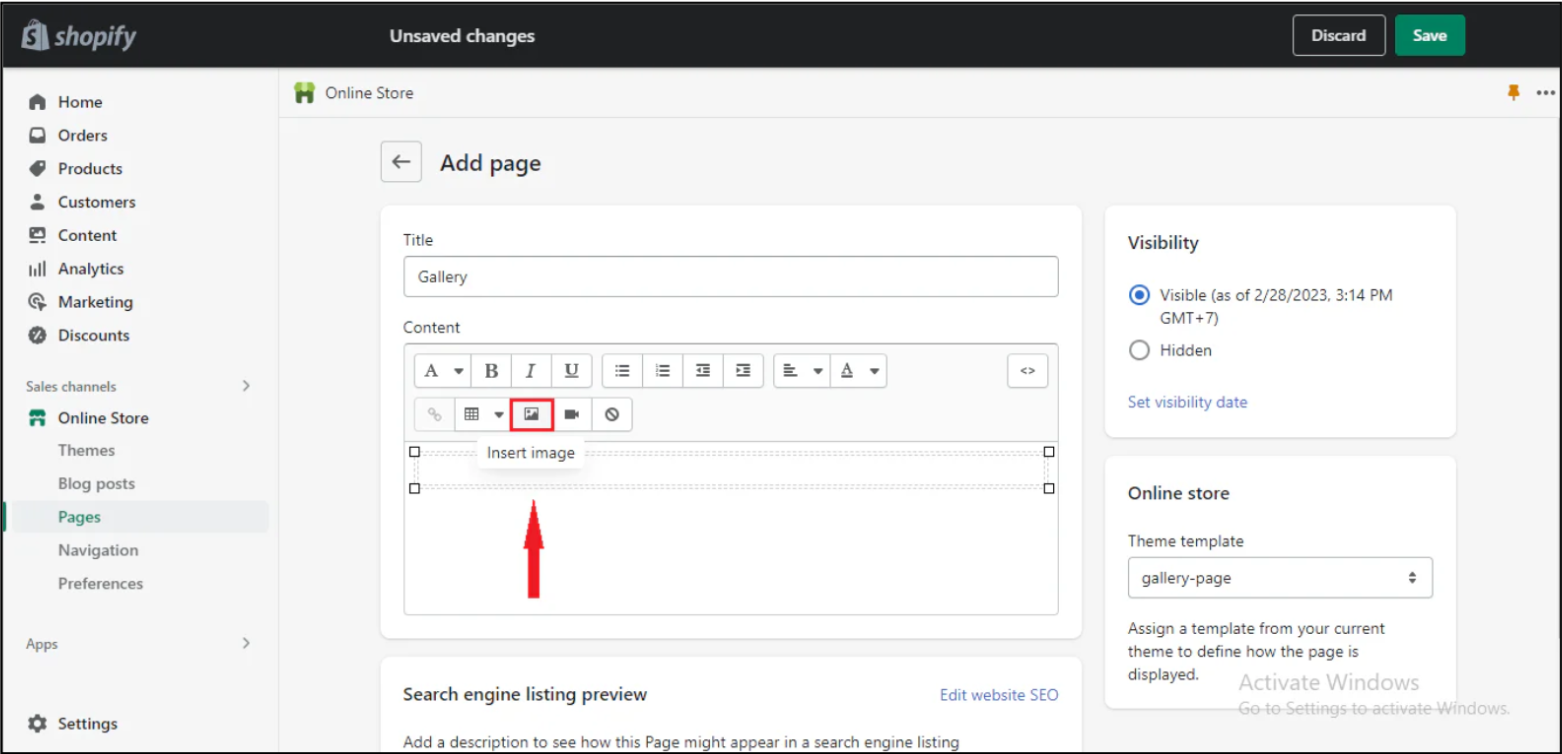
Step 2: Click on the image icon to choose the images for your gallery page.
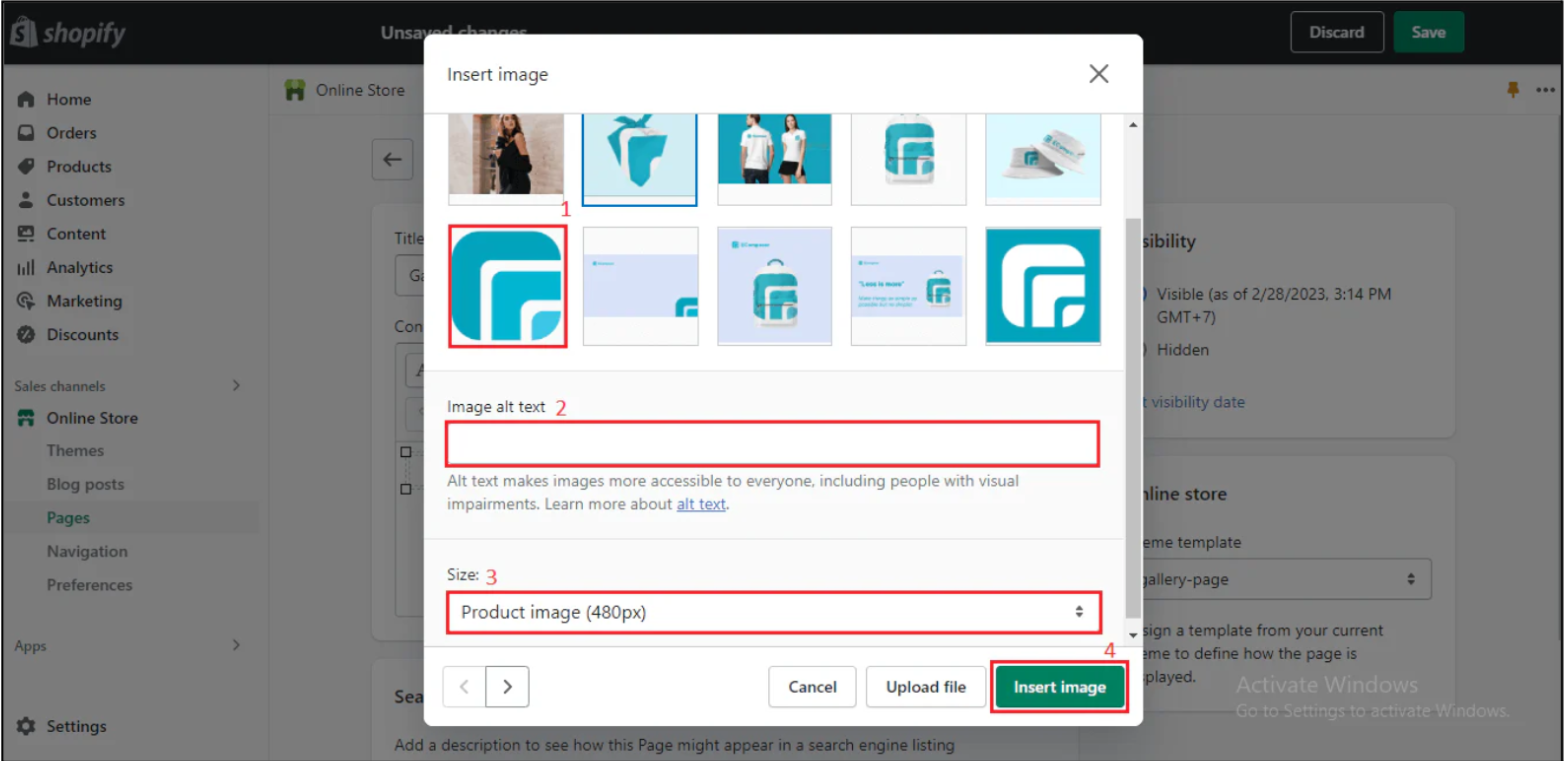
Step 3: Select the respective images to insert in the appropriate columns and rows one by one. Enter “Image alt text” for each image and pick the corresponding size for each picture. Then click on the “Insert Image” button at the bottom.
Save and Publish
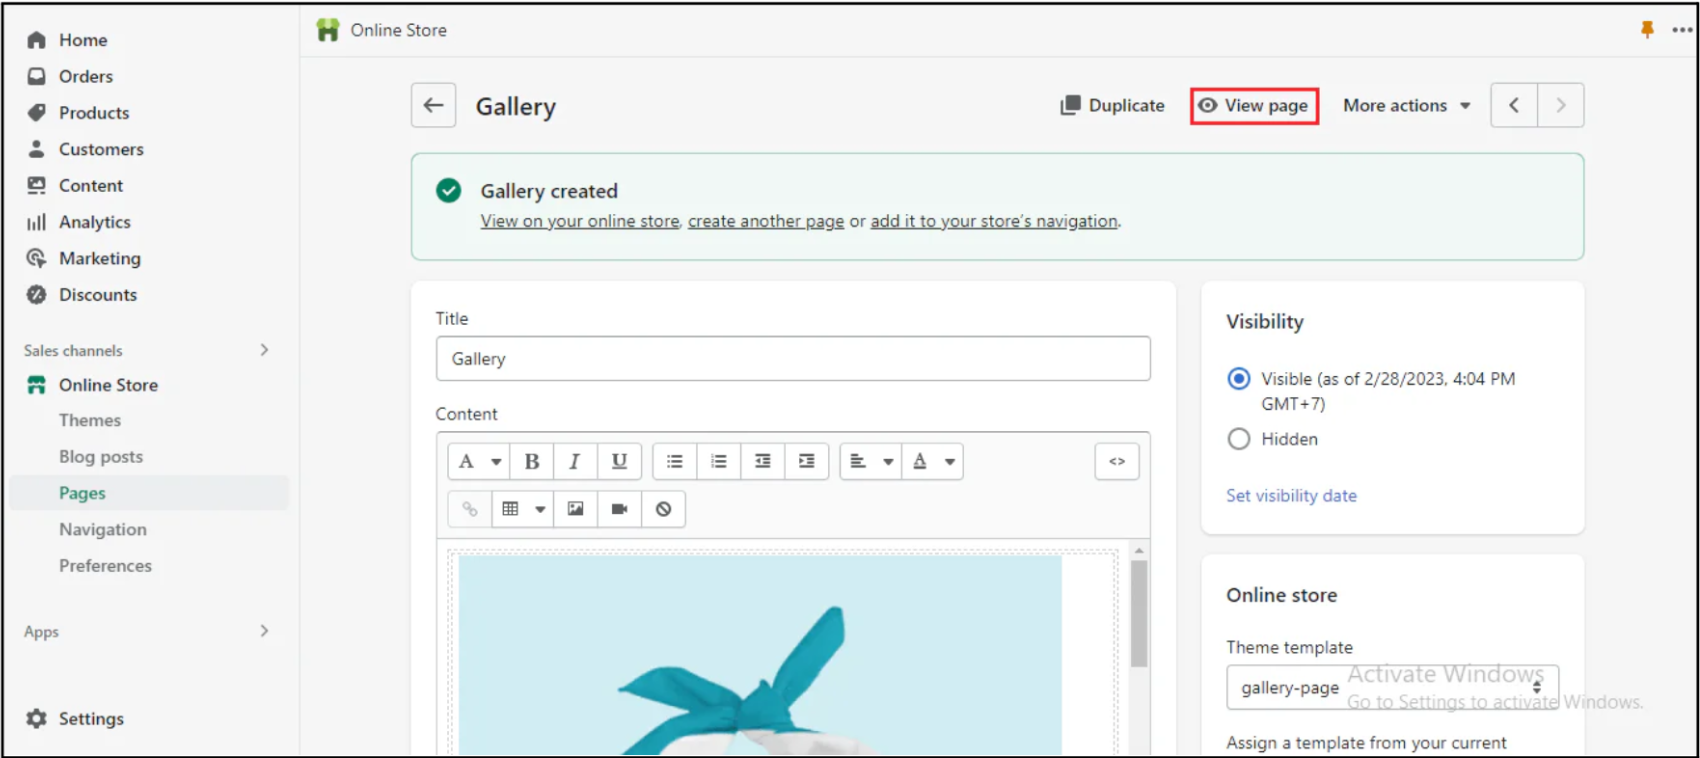
Step 1: After clicking on the “Save” button, your gallery page will successfully be generated.

Step 2: You can see the results by clicking on the “View Page” button at the top of the page.
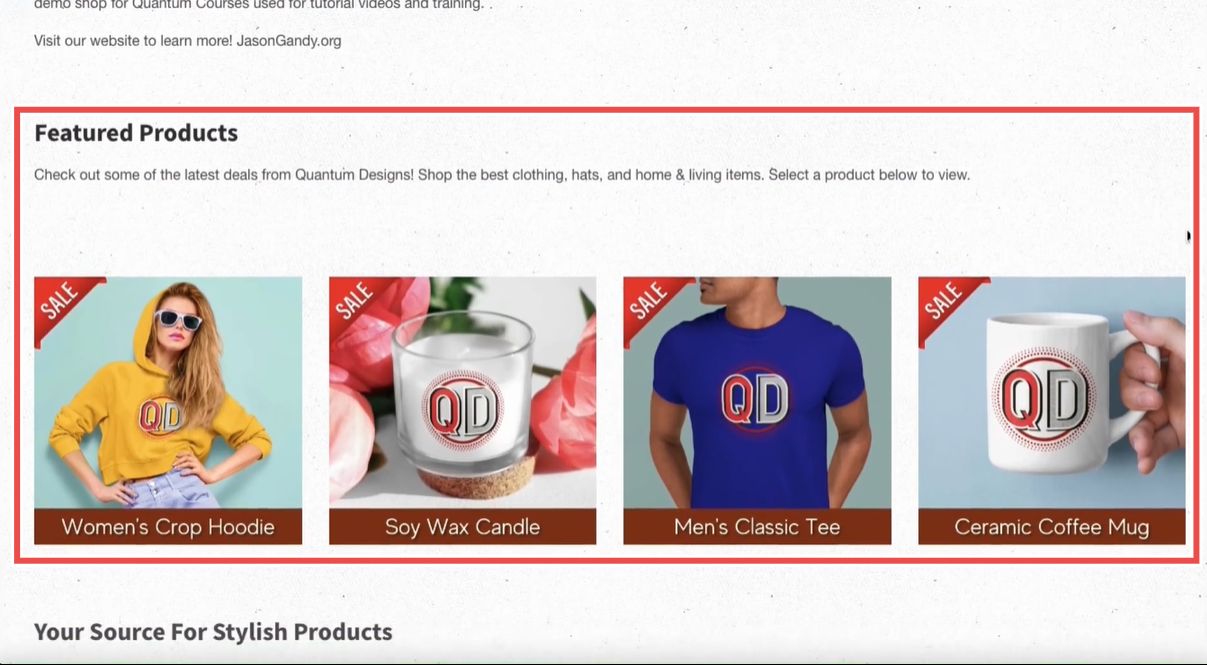
Step 3: After clicking on the “View Page” button, this is how it will look to your customer.