HTTP Live Streaming (HLS) on Amazon CloudFront is a great way to deliver live, low-latency and on-demand video at scale. CloudFront is a CDN (Content Delivery Network) which can flip your deployment to edges all over the world and cache pages on them, reducing latency overall.
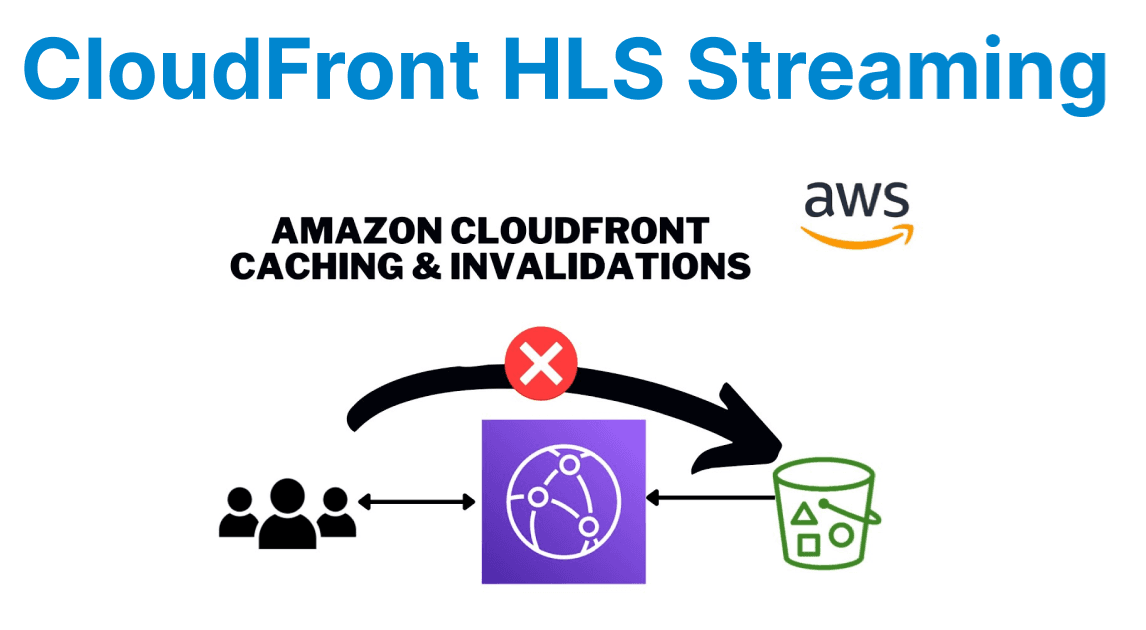
However, the limitation is Cache invalidation and its a catch with using CloudFront for streaming. Because of cache invalidation, viewers are ensured to always get the latest stream and stale content won't interrupt playback.
Step 1: Setting Up Your HLS Stream
To deliver HLS streams to CloudFront, prepare your HLS files (master playlist (m3u8) and video segments). They are commonly produced with encoding software (e.g., FFmpeg) and posted to an S3 bucket for delivery.
Example: FFmpeg Generating HLS Files
Use FFmpeg to transcode a video file into an HLS stream, breaking it up and creating the necessary playlists:
ffmpeg -i input.mp4 -c:v libx264 -preset fast -g 50 -keyint_min 50 -sc_threshold 0 -b:v:0 5000k -maxrate 5000k -bufsize 10000k -hls_time 10 -hls_playlist_type vod -hls_segment_filename "output_%03d.ts" output.m3u8Explanation:
- -hls_time 10: Specifies the segment length at 10 seconds.
- -hls_playlist_type vod: Mark this as a Video on Demand (VOD) stream.
- output.m3u8: The master playlist file.
- output_%03d.ts: Segment files that should be created from a number sequence, for example (output_001. ts, output_002. ts).
Step 2: Uploading HLS Files to S3
After preparing the HLS stream, upload the m3u8 files and video segments (.ts) to an S3 bucket. You can manually perform the above steps, or you can use AWS CLI to automate this process.
aws s3 cp output.m3u8 s3://your-bucket-name/hls/output.m3u8aws s3 cp output_*.ts s3://your-bucket-name/hls/Explanation:
- aws s3 cp uploads the. m3u8 playlist and. ts video segments to an S3 bucket of your own.
And assign the correct permission to this S3 bucket to access those files by CloudFront.
Step 3: Configuring CloudFront Distribution
Provisioned HLS Streaming over CloudFront-Create a CloudFront distribution referencing the S3 bucket in which the HLS file is stored.
Step 1: Log in to AWS Console and navigate to CloudFront.
Step 2: Develop a Distribution:
- Select Web distribution.
- For Origin Domain Name, choose your S3 bucket from the list.
- Verify the Viewer Protocol Policy is set to Redirect HTTP to HTTPS for secure streaming.
Step 3: Cache Behavior Settings:
- Set Path Pattern to .m3u8 for the playlist and .ts for video segments.
- Choose Cache and origin request settings as Use Cache Policy and Origin Request Policy.
Step 4: Configure Cache Control Headers in S3:
- You can configure your S3 files with Cache-Control headers so that you can determine how long CloudFront caches them.
- In the case of .ts segments, you would want to specify a short expiration time so that they remain current.
- Example: Cache-Control: public, max-age=60
Step 4: Configuring Cache Invalidation
As content is updated, for example, when a new video segment or playlist is added, CloudFront by default caches the old versions. Cache invalidation deletes the old content from CloudFront's edge locations so that users get the updated content.
Example: Invalidate Cache Using AWS CLI
To invalidate specific files or all files in your CloudFront distribution, use the following AWS CLI command:
aws cloudfront create-invalidation --distribution-id YOUR_DISTRIBUTION_ID --paths "/hls/*"Explanation:
- This command invalidates the whole HLS folder in the CloudFront distribution, erasing any cached.m3u8 playlists or .ts video segments.
Best Practices for Cache Invalidation:
- Avoid constant invalidation: Frequent cache invalidations might trigger unnecessary costs. Use versioned URLs (e.g., output_v2.m3u8) to refresh content without having cache still sitting on old content.
- Invalid only what’s necessary: Instead of invalidating the whole paths (e.g., updated playlists or segments), which leads to performance and charging optimizations.
Step 5: Testing and Monitoring
Once you've configured CloudFront distribution and cache invalidation, test video playback in a variety of contexts to check that the HLS stream works properly.
Testing:
- Verify the stream loads correctly by navigating to the CloudFront URL and checking the playback in several browsers.
- Verify that CloudFront is serving content from the closest edge point and check the buffering timings.
Monitoring:
- To monitor metrics like request volume, data transfer, and cache hit ratio, use AWS CloudWatch.
- Think about changing your cache settings or invalidation approach if you observe significant cache miss rates.
Step 6: Optimizing HLS Streaming Optimization
Apply these changes to make sure your HLS Stream runs smoothly and provides an uninterrupted playback.
Use Multiple Bitrate Streams: Use a good adaptive bitrate streaming where you offer multiple quality streams (for example, 360p, 720p, and 1080p)
Optimize Segments: Short Segments (e.g., 2-4 seconds) will help in reducing startup latency and improving the overall user experience, especially for Live Streaming.
Cross-Origin Resource Sharing (CORS): If you want CloudFront to be able to fetch resources, make sure your S3 bucket has the correct CORS.