Setting up a Moodle assignment to accept Google Slides helps instructors collect learner presentations in one place without dealing with file-format issues. Many learners prefer creating their work directly in Google Slides, so enabling this option removes extra steps like downloading or converting files.
In addition, it also ensures that submissions stay consistent, easy to view, and accessible across devices. By allowing Google Slides to be used directly within a Moodle assignment, instructors can maintain an uninterrupted workflow while giving learners a format that supports visual and collaborative work.
Prerequisites
- You must have instructor or admin permissions in the Moodle course to edit activities.
- learners need Google accounts to create and share their slides.
- Ensure your Moodle site allows online text submissions, which most do by default; if not, contact your site admin to enable it.
- Have the course open in your browser with editing mode turned on.
Setting Up Moodle Assignment to Allow Google Slides Submission
Allowing Google Slides in a Moodle assignment makes it possible for learners to submit their presentations without converting them into other formats. This setup helps instructors review slide-based work more easily and keeps the submissions consistent and accessible.
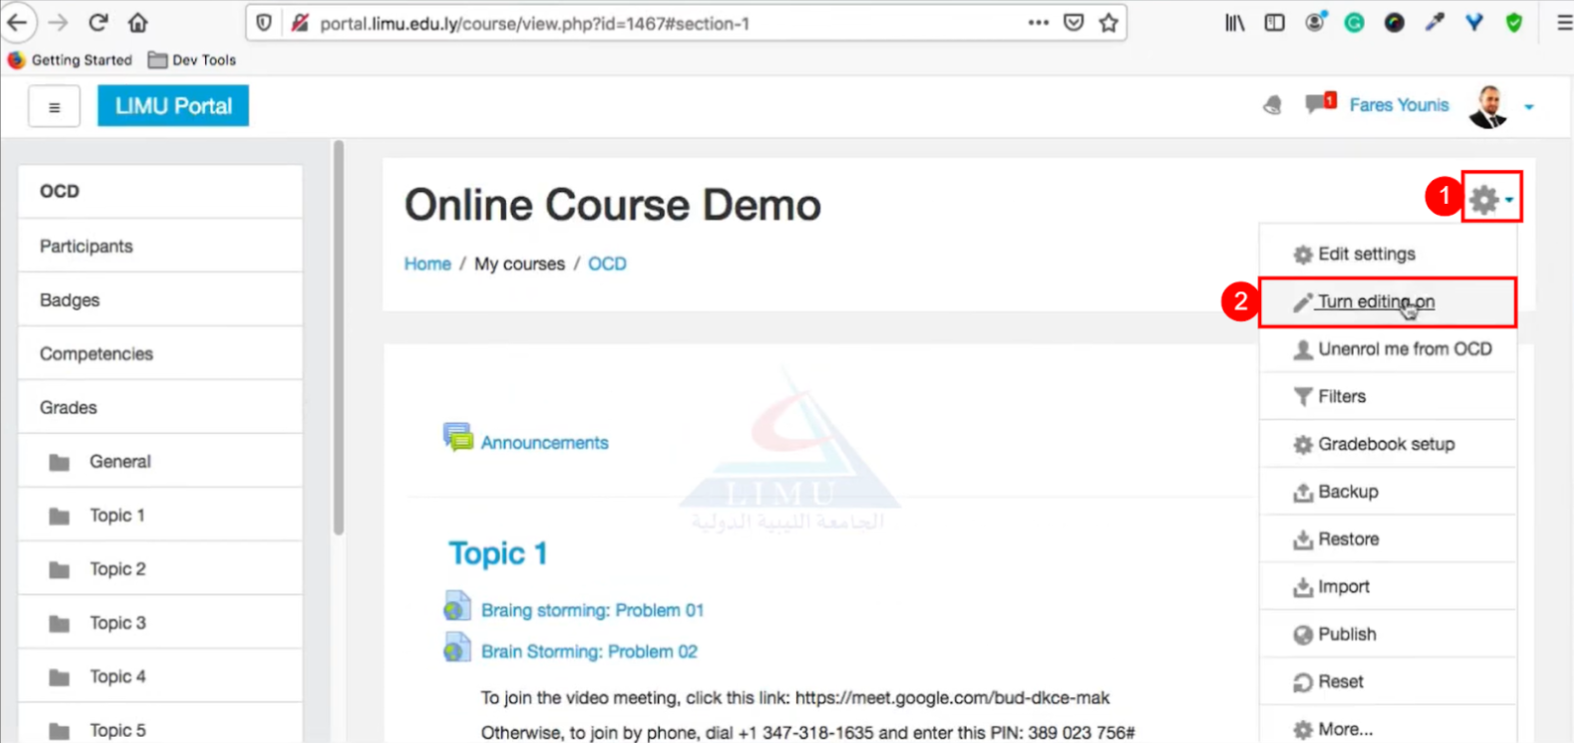
Step 1: Log in to Moodle and go to your course, then locate the assignment in which you want to allow Google Slides submission.
Step 2: Click on the Settings gear icon in the top-right corner of the screen, then click on the “Turn editing on" option.
Step 3: A new window will open where you can edit the assignment that you opened in the first step.
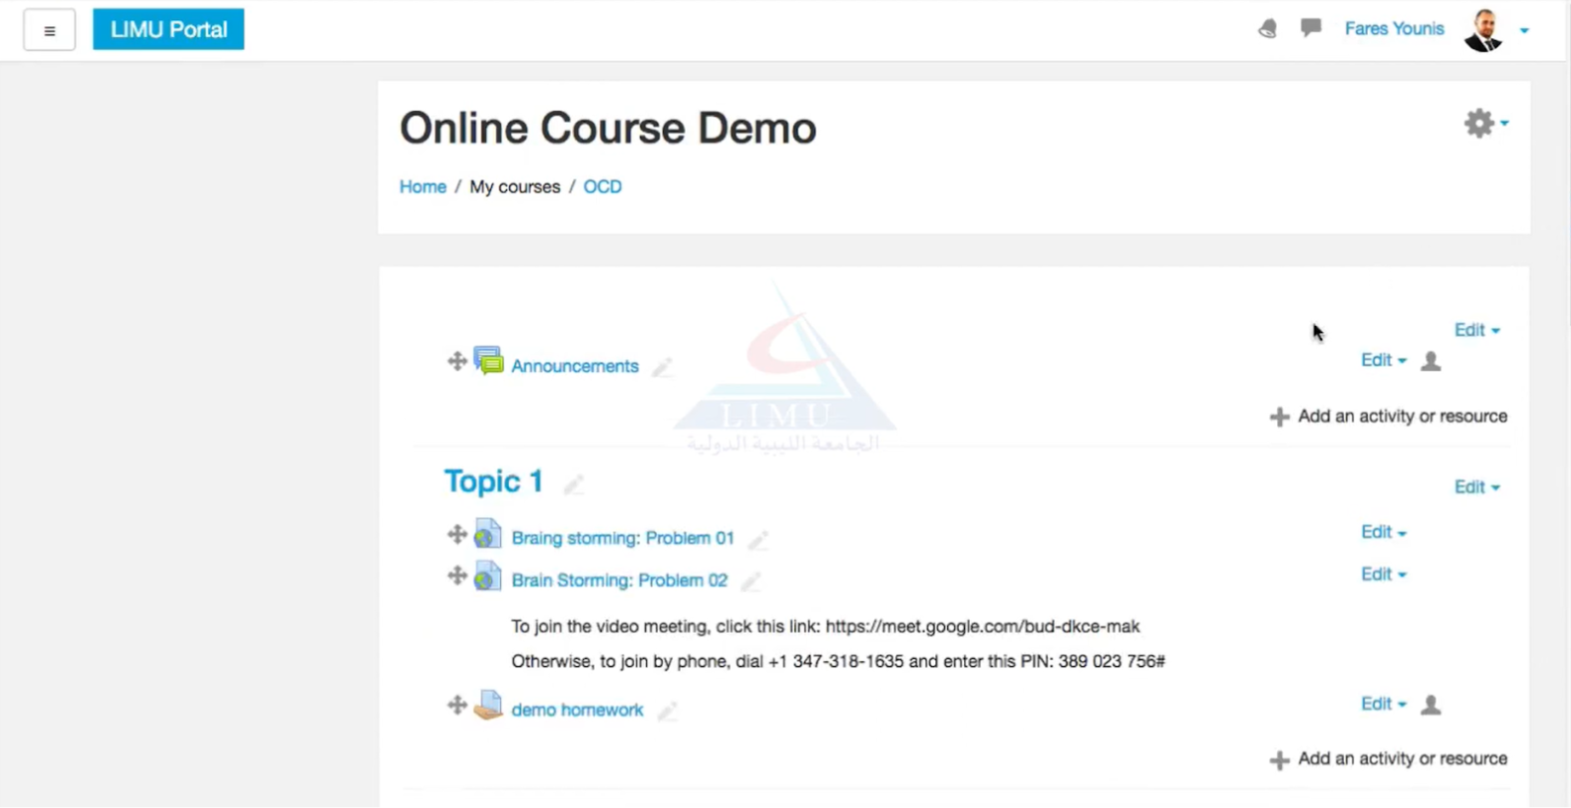
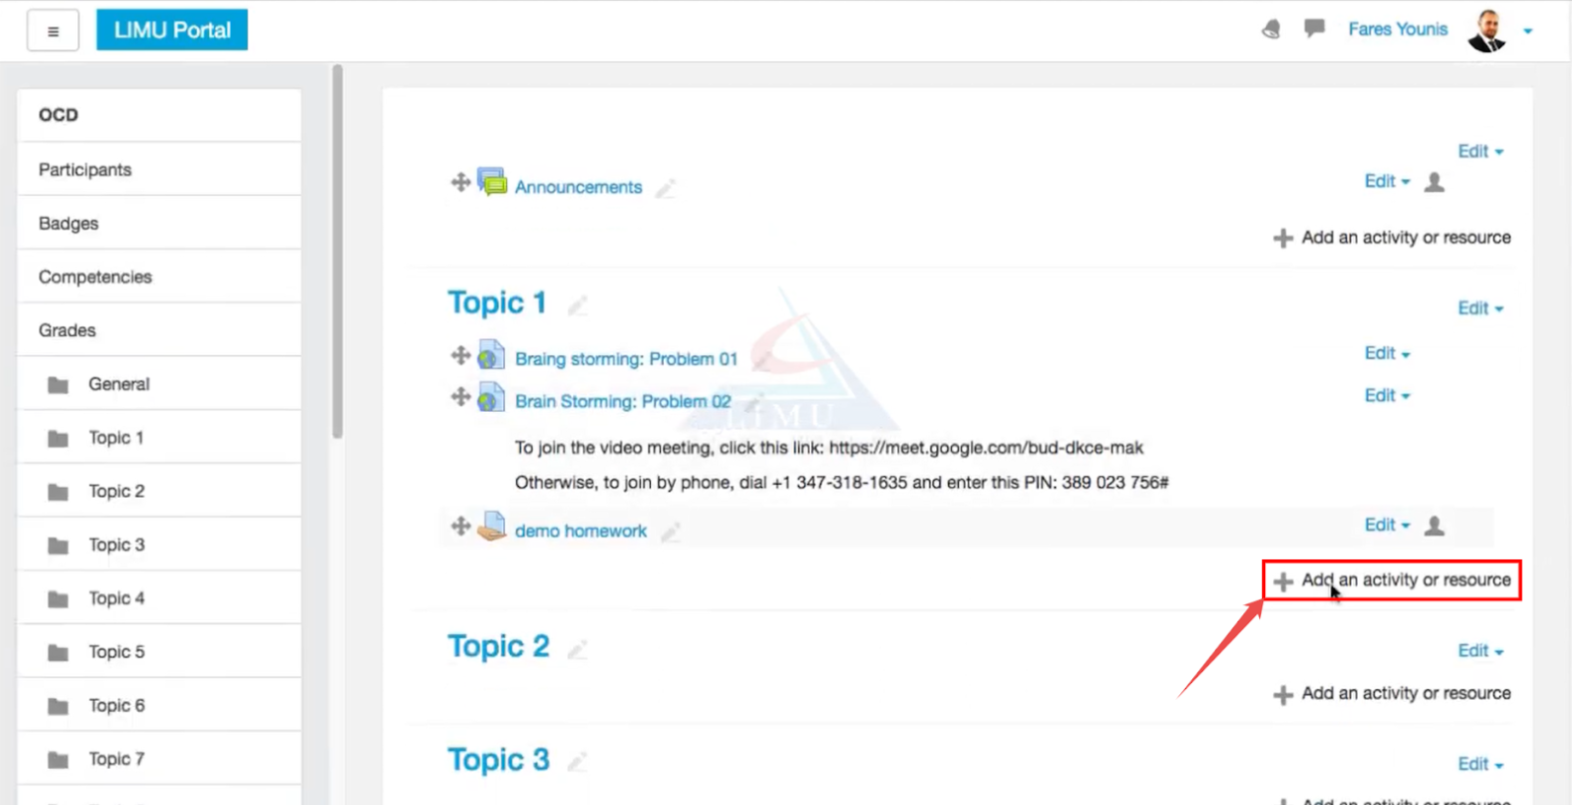
Step 4: Scroll down and click on the “+ Add an activity or resource” button under the section in which you want to allow Google Slides submission.

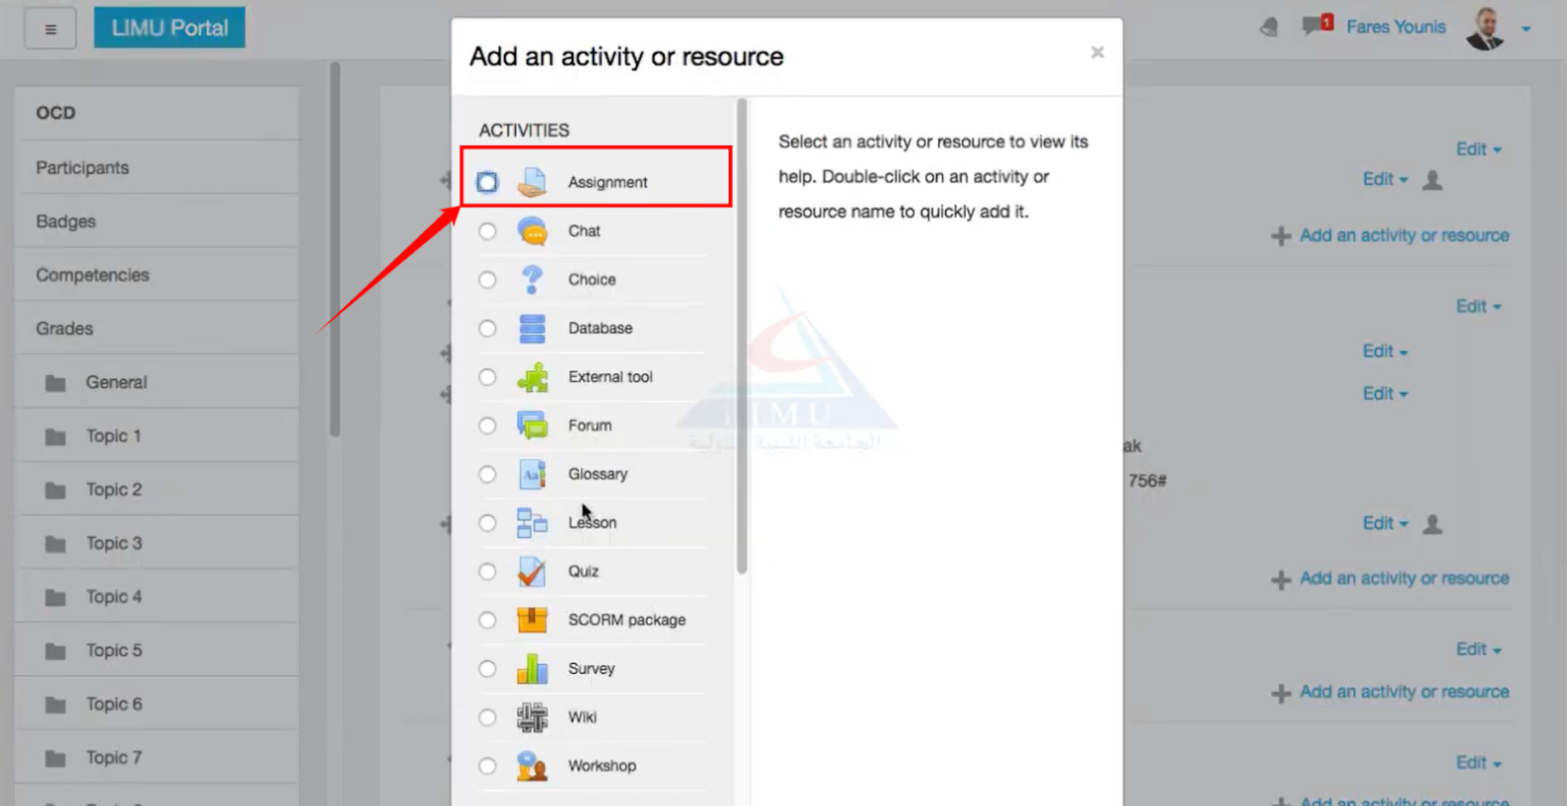
Step 5: An “Add an activity or resource” modal will open on the screen. Under the “Activities” section, click on the “Assignment” radio button.
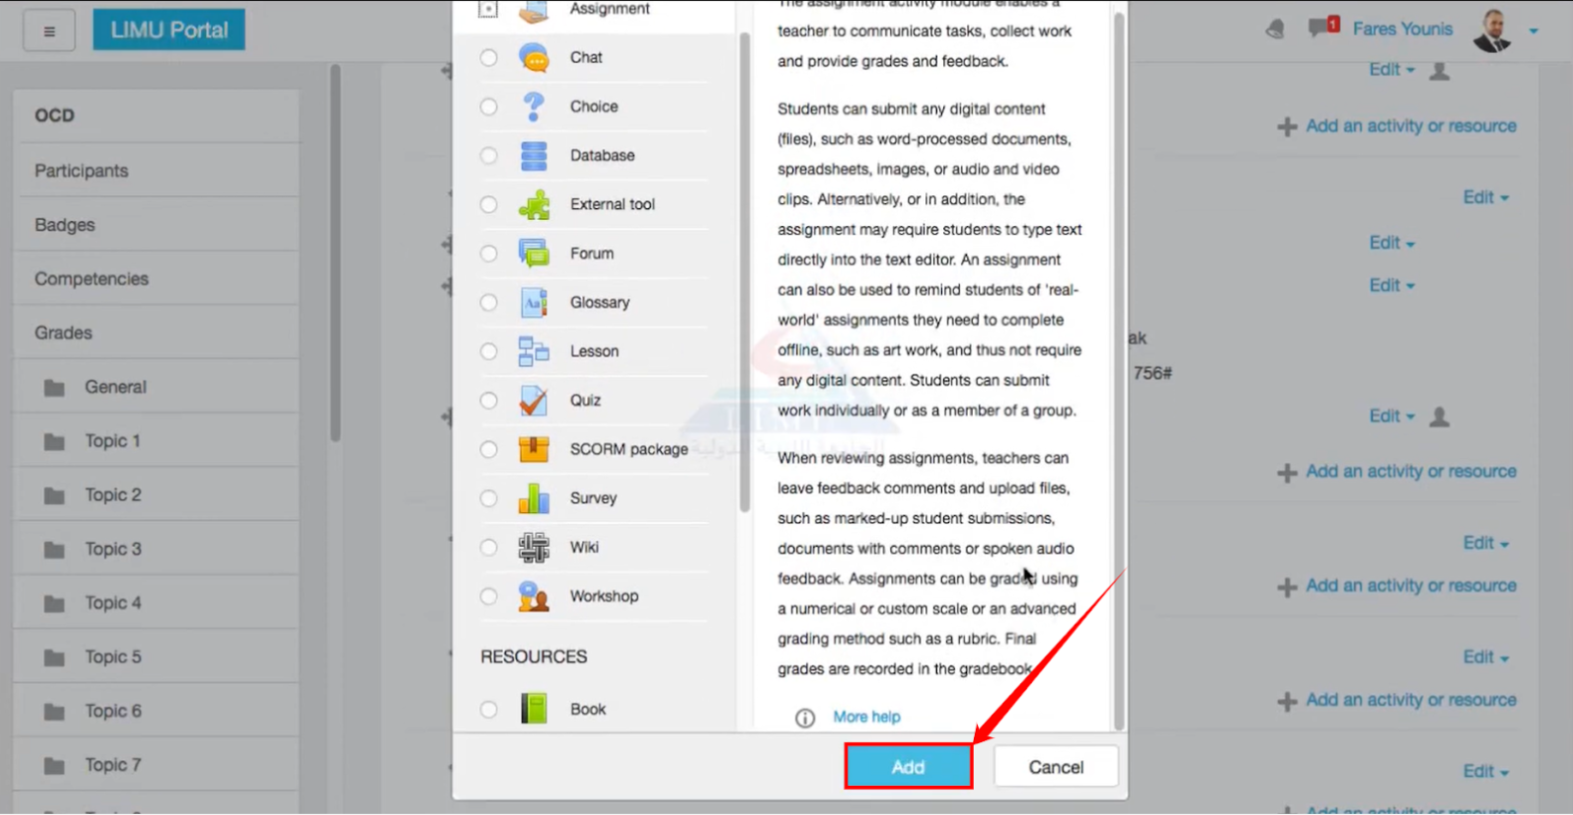
Step 6: Scroll down to the bottom of the modal, then click on the “Add” button.
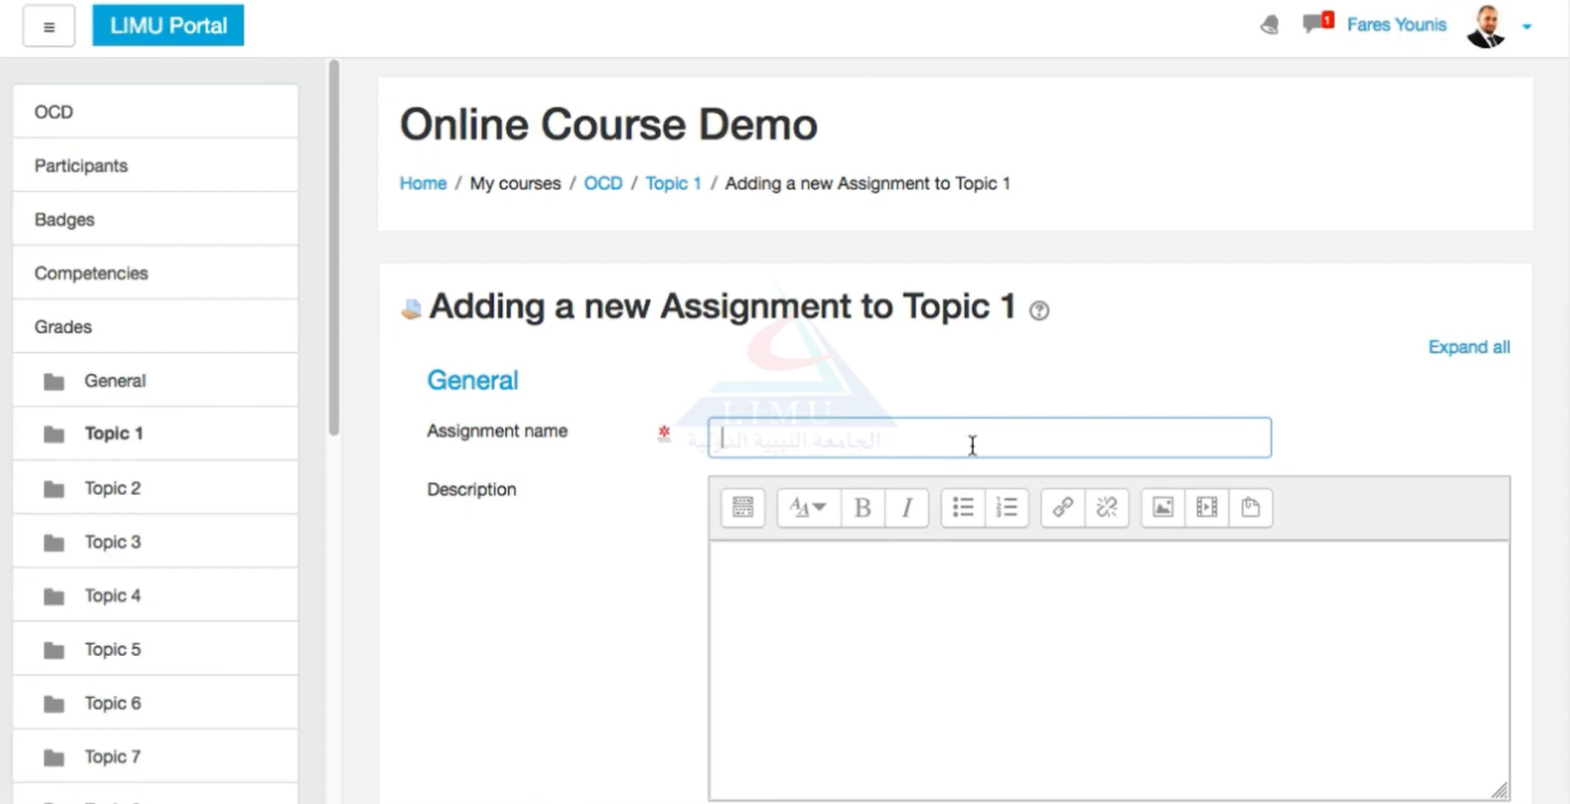
Step 7: The editing page will open for the assignment you selected in the first step. Fill in the necessary columns, such as assignment name and description.
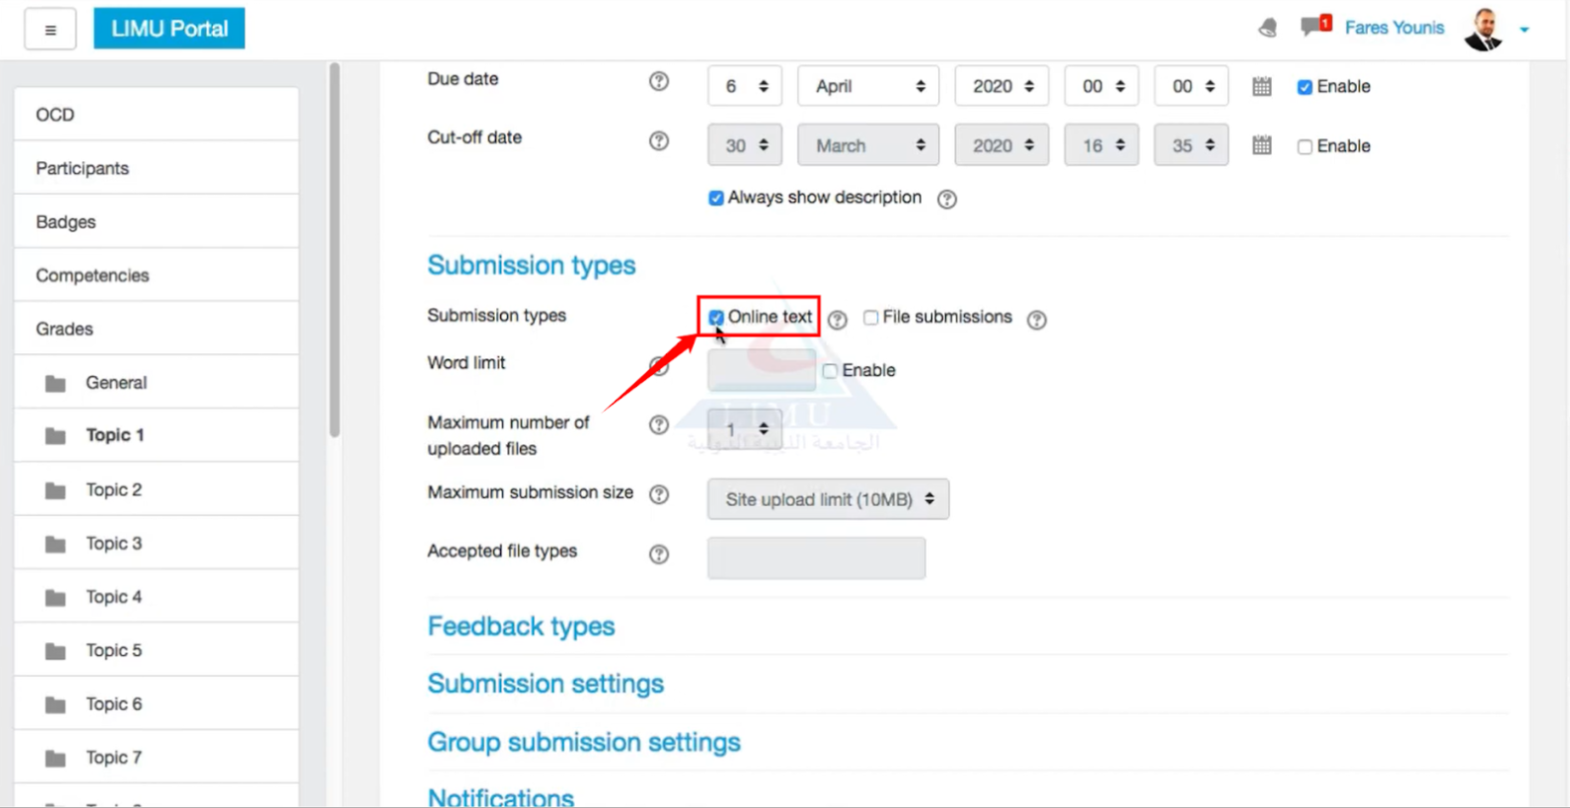
Step 8: Scroll down to the “Submissions types” section, then click on the “Online text” checkbox.
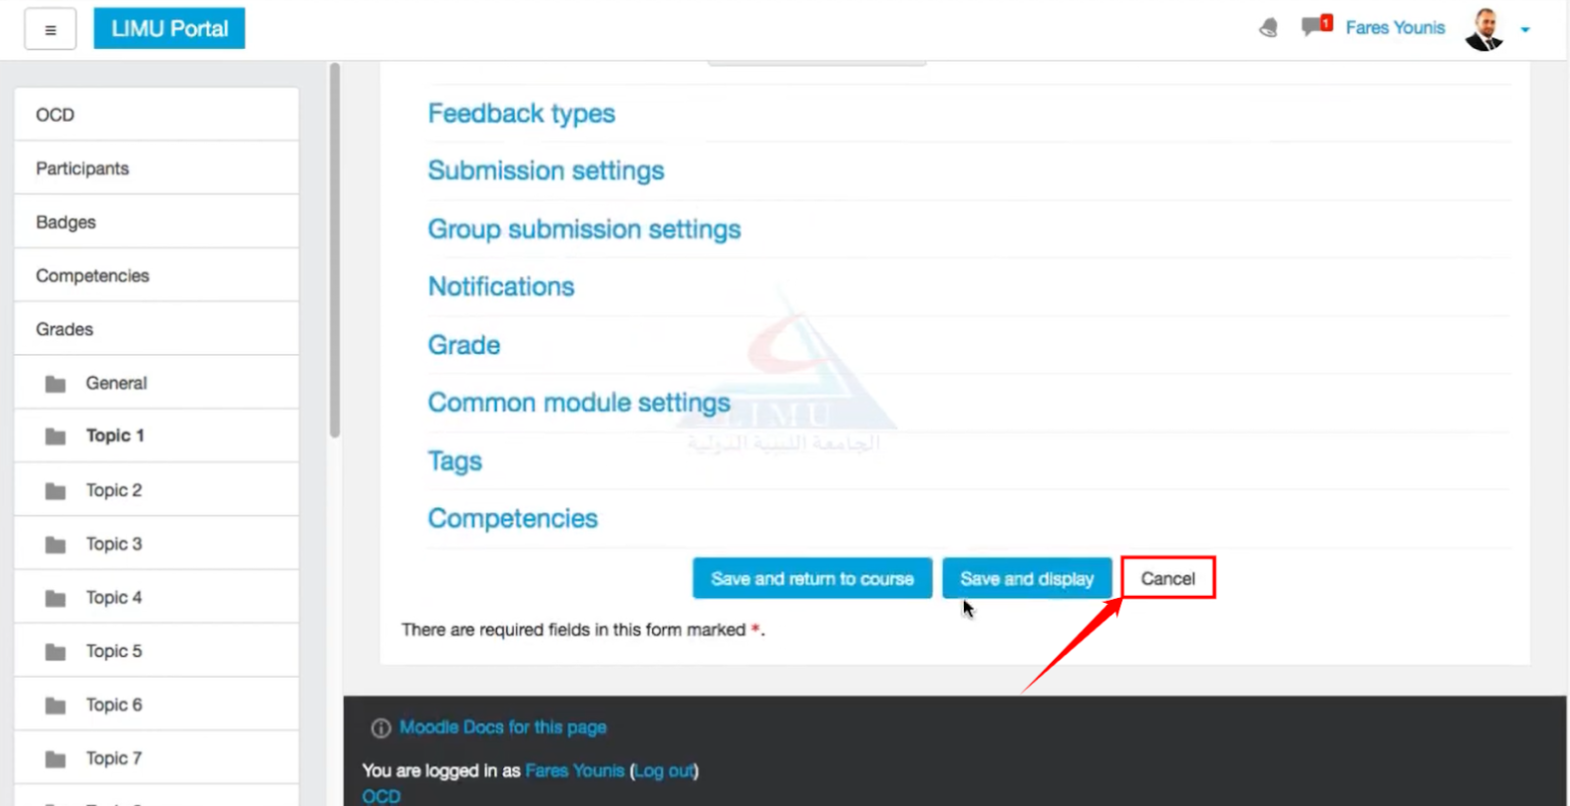
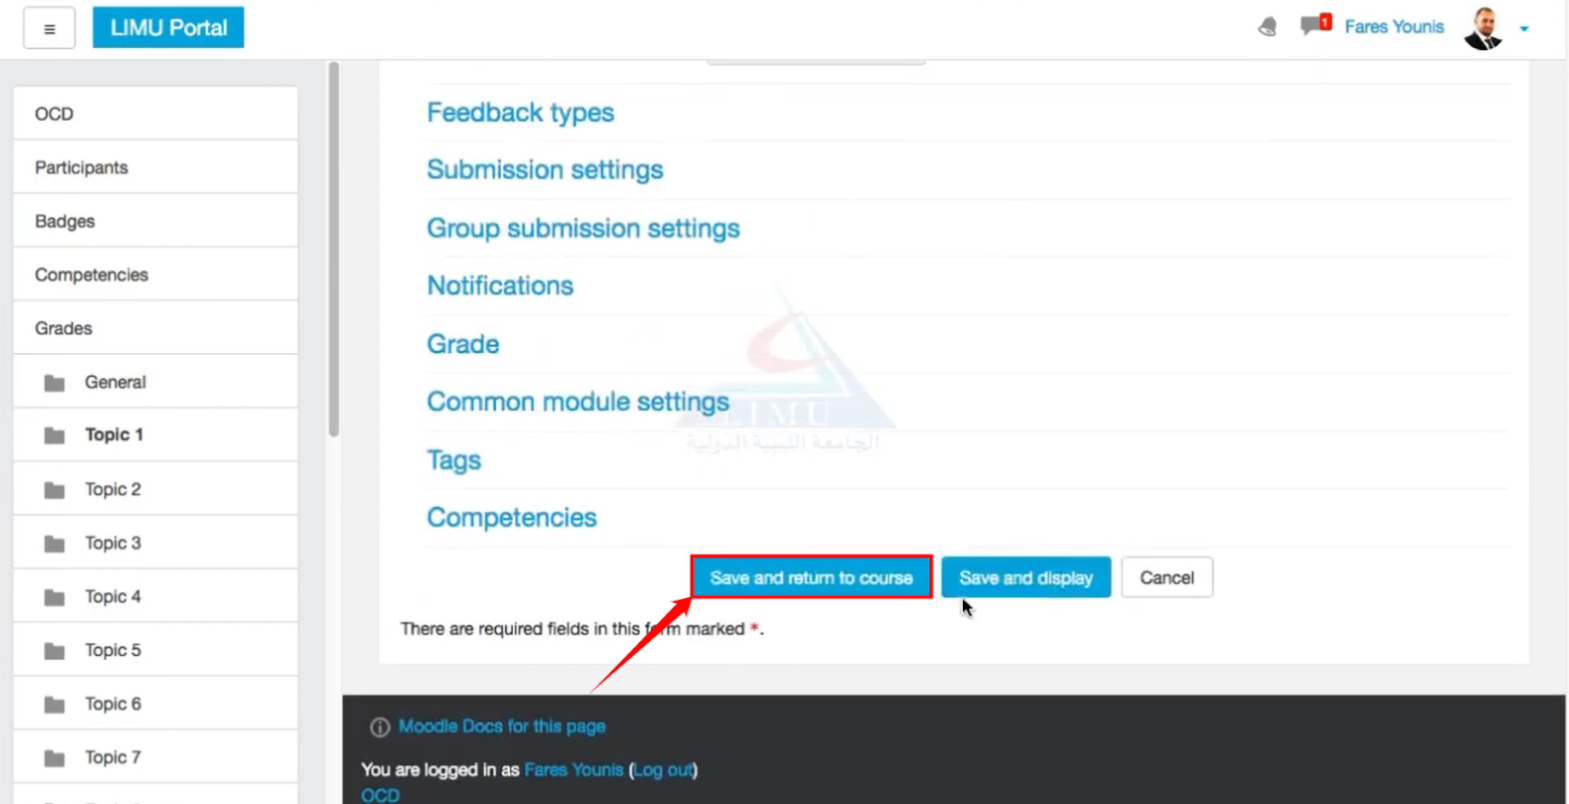
Step 9: Scroll down to the bottom of the page. Then click on the “Save and return to course” button to save the changes you’ve made and return to the assignment.
Step 10: If you want to view the changes you’ve made, click on the “Save and display” button.
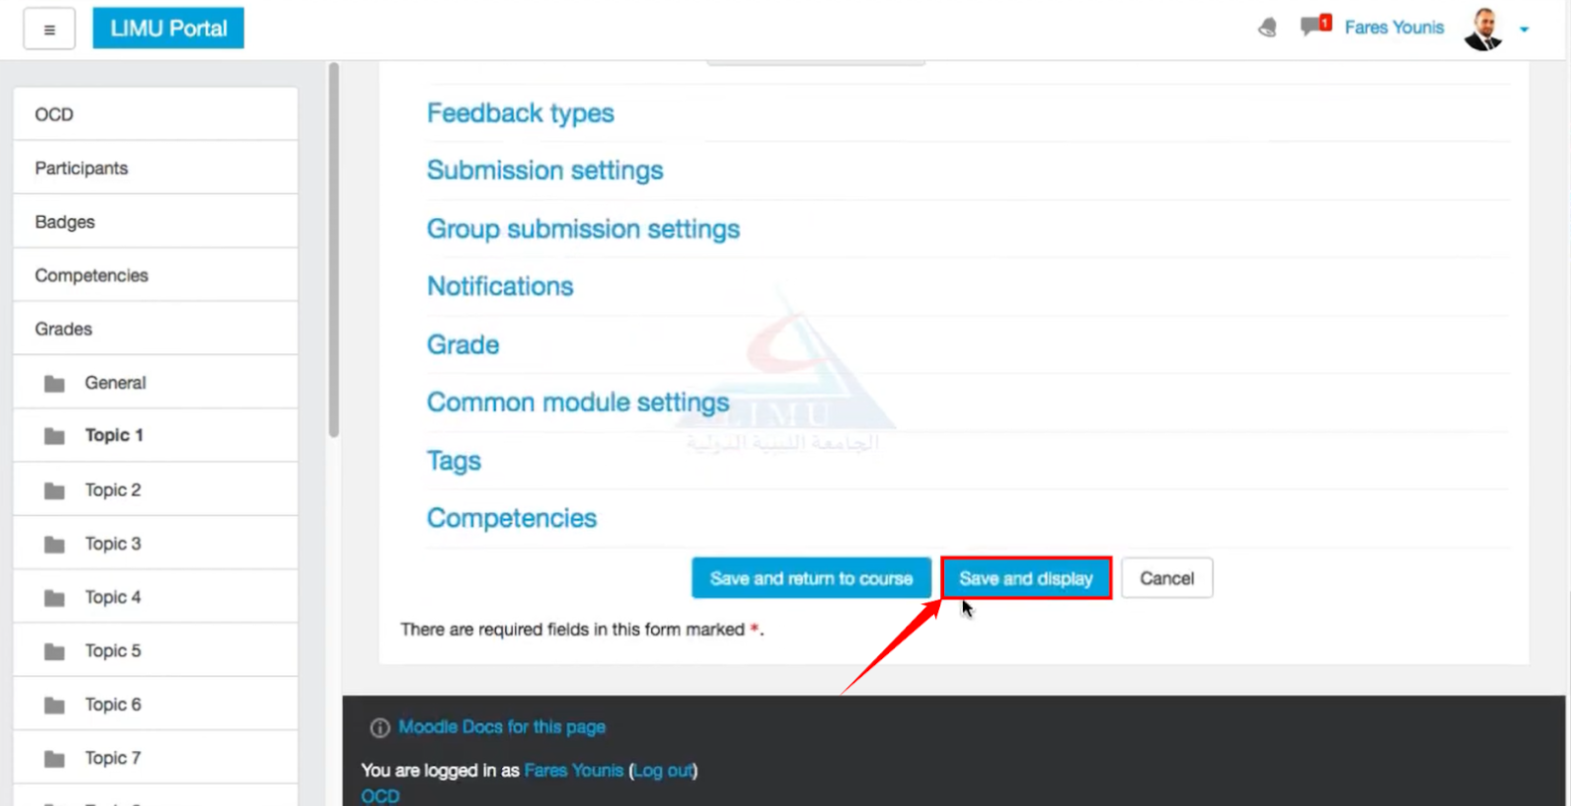
Step 11: You can also click on the “Cancel” button if you don’t want to make changes anymore.