Flutter is a popular framework for building cross-platform applications with a single codebase. It simplifies the development process by allowing developers to create apps for both Android and iOS without writing separate code for each platform.
Creating a simple application in Flutter helps you understand the core structure, widgets, and workflows of the framework, giving you the foundation needed to build more complex projects. By mastering the basics, you’ll be able to rapidly prototype and develop apps that perform well across different devices with minimal effort.
Prerequisites
Before you begin creating a Flutter application, make sure you have the following tools and software installed:
- Flutter SDK: Download and install the Flutter SDK from the official Flutter website.
- Dart SDK: Dart is the programming language used by Flutter. It comes bundled with the Flutter SDK, but ensure you have it installed correctly.
- Android Studio or Visual Studio Code: You’ll need an IDE (Integrated Development Environment) to work with Flutter. You can use Android Studio or Visual Studio Code.
- Flutter Plugin for Android Studio or VS Code: Install the Flutter plugin to enable Flutter-specific features like code completion, debugging, and widget inspection in your chosen IDE.
- Xcode (macOS Only): If you’re developing for iOS, you’ll need Xcode installed on your Mac to build and run Flutter apps on iOS simulators or devices.
Once these prerequisites are set up, you can begin creating your Flutter project.
Creating a New Flutter Project Using Android Studio
Android Studio is a popular Integrated Development Environment (IDE) for Flutter development that offers a set of tools & features for building Android and cross-platform apps. Setting up a new Flutter project here ensures you have an environment for writing, testing, and debugging your code while using Android Studio’s powerful capabilities.
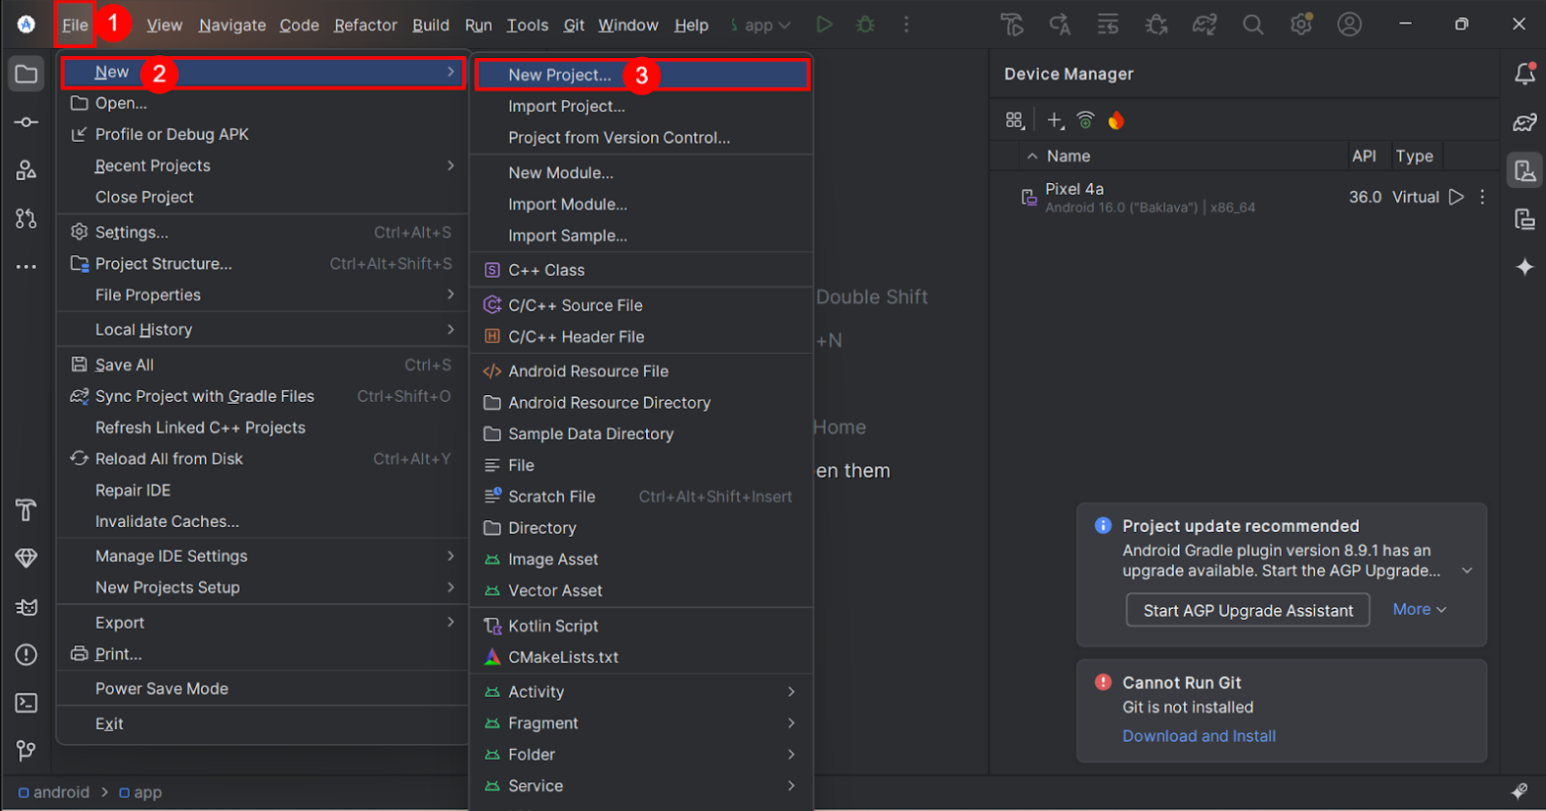
Step 1: Open Android Studio and select the “File” > “New” > "New Project…" options.
Note: If you like to create a Flutter project using the terminal, use the command below and jump right into step 6.
$ flutter create flutter_appReplace the ' flutter_app ' with your project name
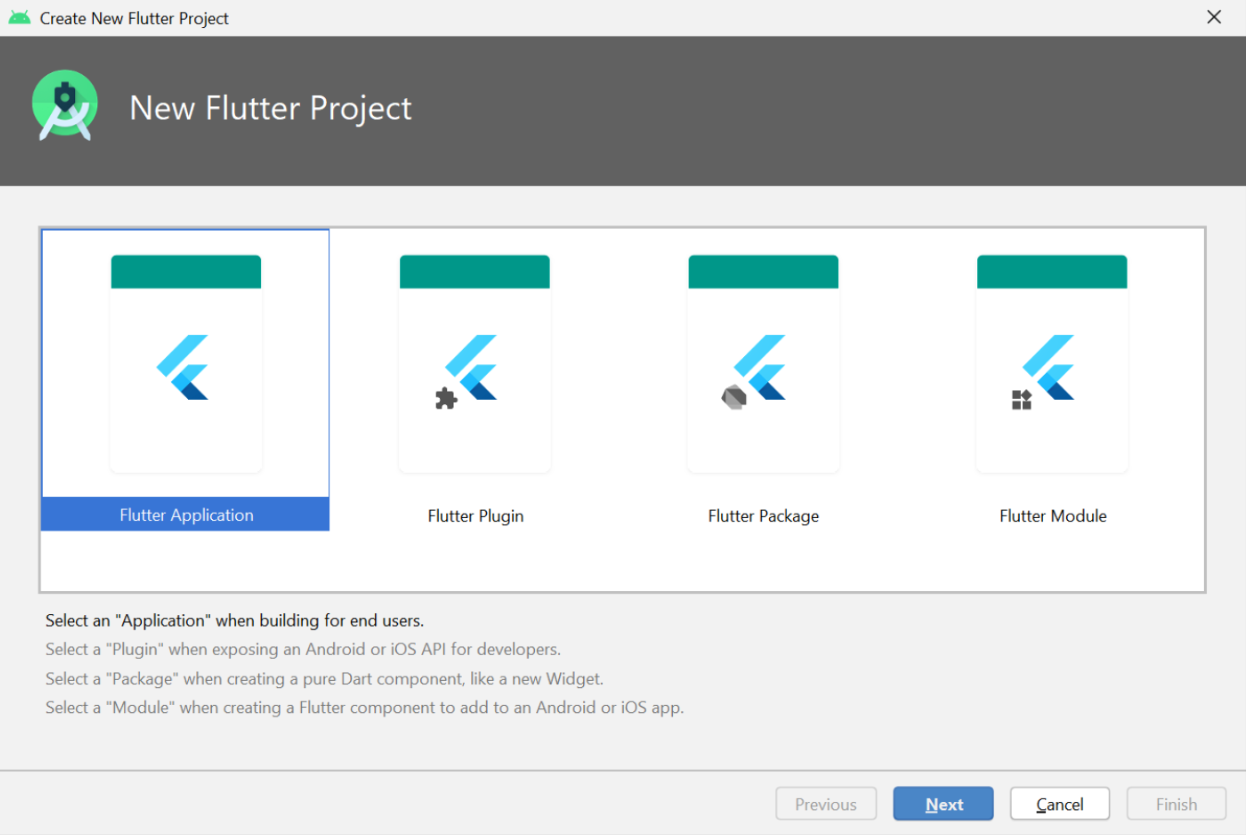
Step 2: Choose “Flutter Application” as the project type, then click on the “Next” button.
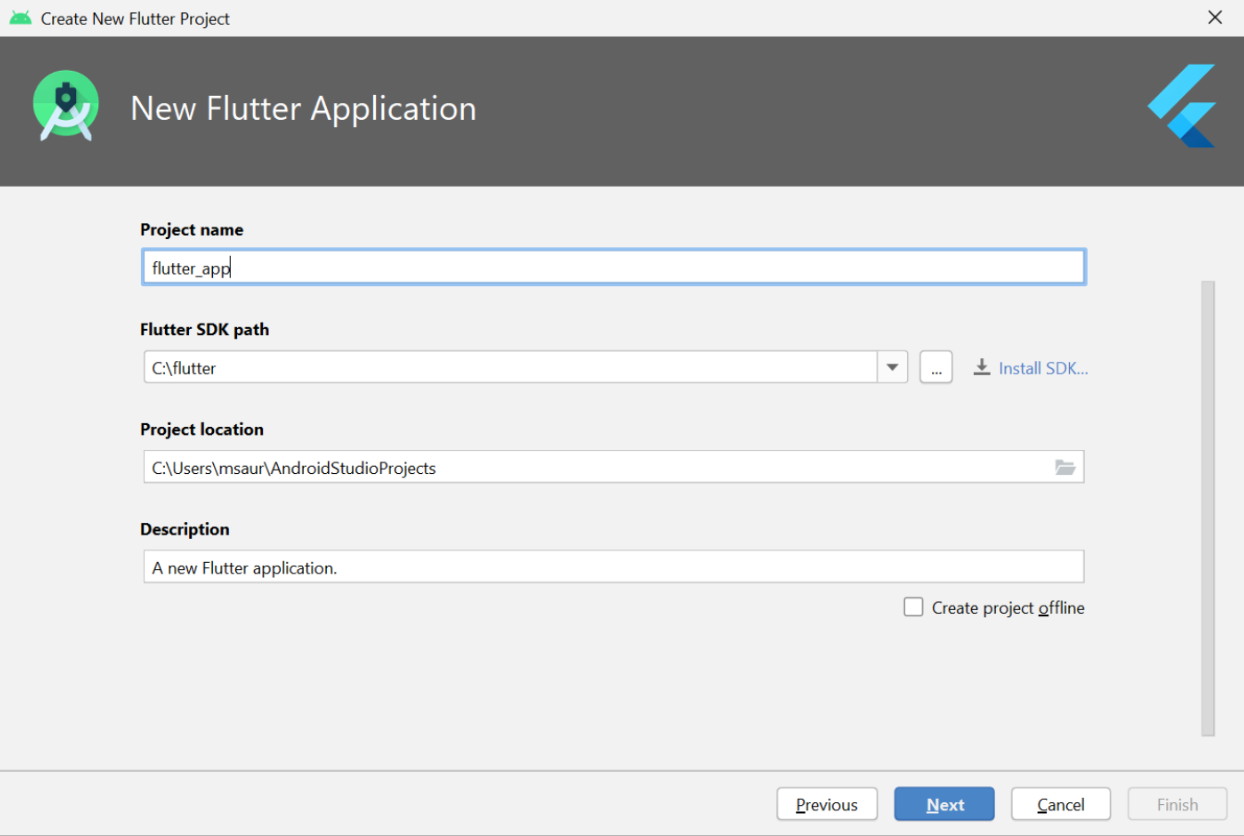
Step 3: Ensure the Flutter SDK path is set correctly. If the field is empty, select “Install SDK…” to add the path.
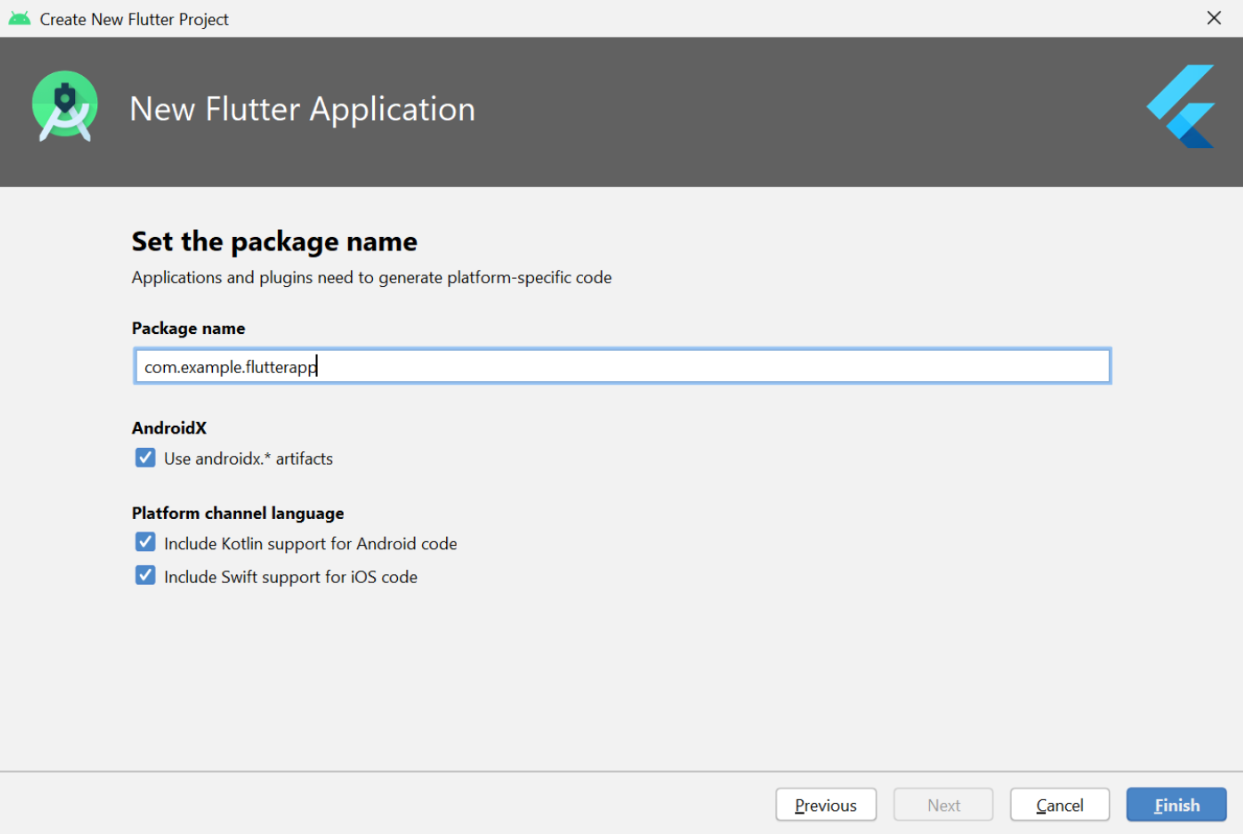
Step 4: Enter your project name (e.g., myapp) and click on the “Next” option.
Note:
- Project name: flutter_app
- Flutter SDK Path: <path-to-flutter-sdk>
- Project Location: <path-to-project-folder>
- Description: Flutter-based simple application
Step 5: Click on the “Finish” button and wait for Android Studio to create the project.
Step 6: Once the project is created, you can edit the code to display the output you want. Android Studio will have generated a basic Flutter app. Let’s look at its structure and change the code to suit our needs.
Step 7: Edit the code in the main.dart file. Android Studio has already created most of the files for your app. Now, replace the code in lib/main.dart with the following:
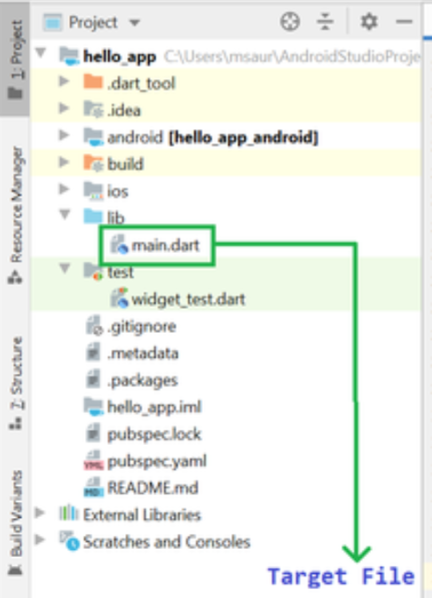
main.dart:
// Importing important packages require to connect
// Flutter and Dart
import 'package:flutter/material.dart';

// Main Function
void main() {

// Giving command to runApp() to run the app.
runApp(const MyApp());
}

// Widget is used to create UI in flutter framework.

class MyApp extends StatelessWidget {
const MyApp({Key? key}) : super(key: key);

// This widget is the root of your application.
@override
Widget build(BuildContext context) {
return MaterialApp(

// title of the application
title: 'Hello World Demo Application',

// theme of the widget
theme: ThemeData(
primarySwatch: Colors.lightGreen,
),

// Inner UI of the application
home: const MyHomePage(title: 'Home page'),
);
}
}

// This class is similar to MyApp instead it
// returns Scaffold Widget
class MyHomePage extends StatelessWidget {
const MyHomePage({Key? key, required this.title}) : super(key: key);
final String title;

@override
Widget build(BuildContext context) {
return Scaffold(
appBar: AppBar(
title: Text(title),
backgroundColor: Colors.green,
foregroundColor: Colors.white,
),

// Sets the content to the
// center of the application page
body: const Center(

// Sets the content of the Application
child: Text(
'Welcome to Android Studio!',
)),
);
}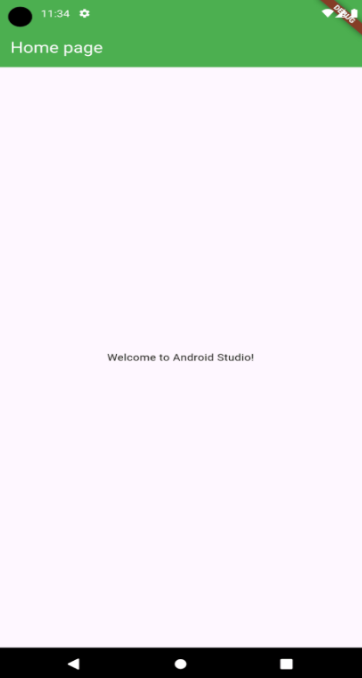
}Output: This code will display a simple app with a green app bar and a message saying "Welcome to Android Studio!"

Create a New Flutter Project Using Visual Studio Code
Visual Studio Code is a lightweight yet powerful code editor that supports Flutter development through its extensions. It's great for developers who prefer a simpler & faster editor without the full weight of an IDE, providing a simple environment for building and running Flutter apps with ease.
Step 1: Open the Visual Studio Code IDE
Note: If you prefer using the terminal to create a project, skip to Step 7 and use the command below:
$ flutter create flutter_appReplace “flutter_app” with your project name
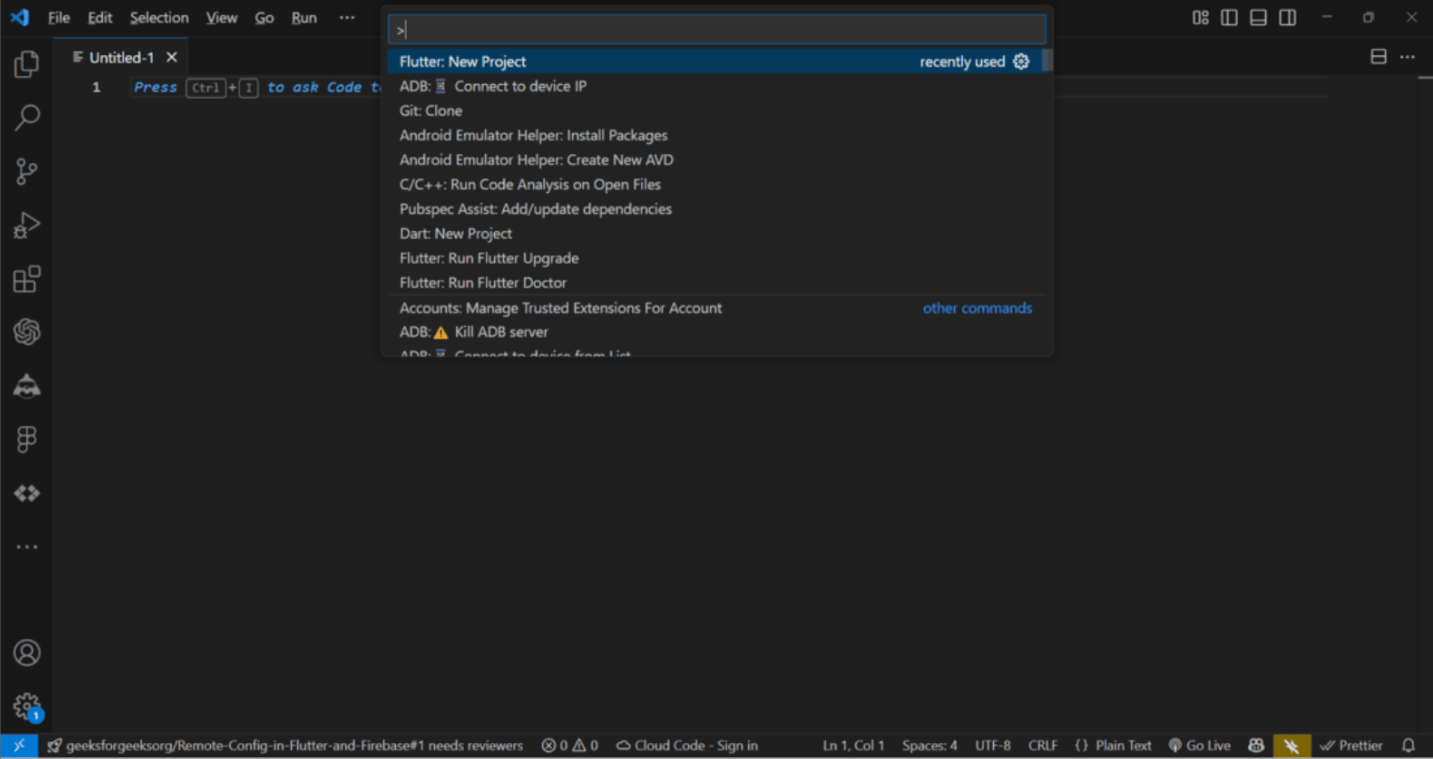
Step 2: Go to View->Command Palette or press Ctrl+Shift+P to open the Command Palette.
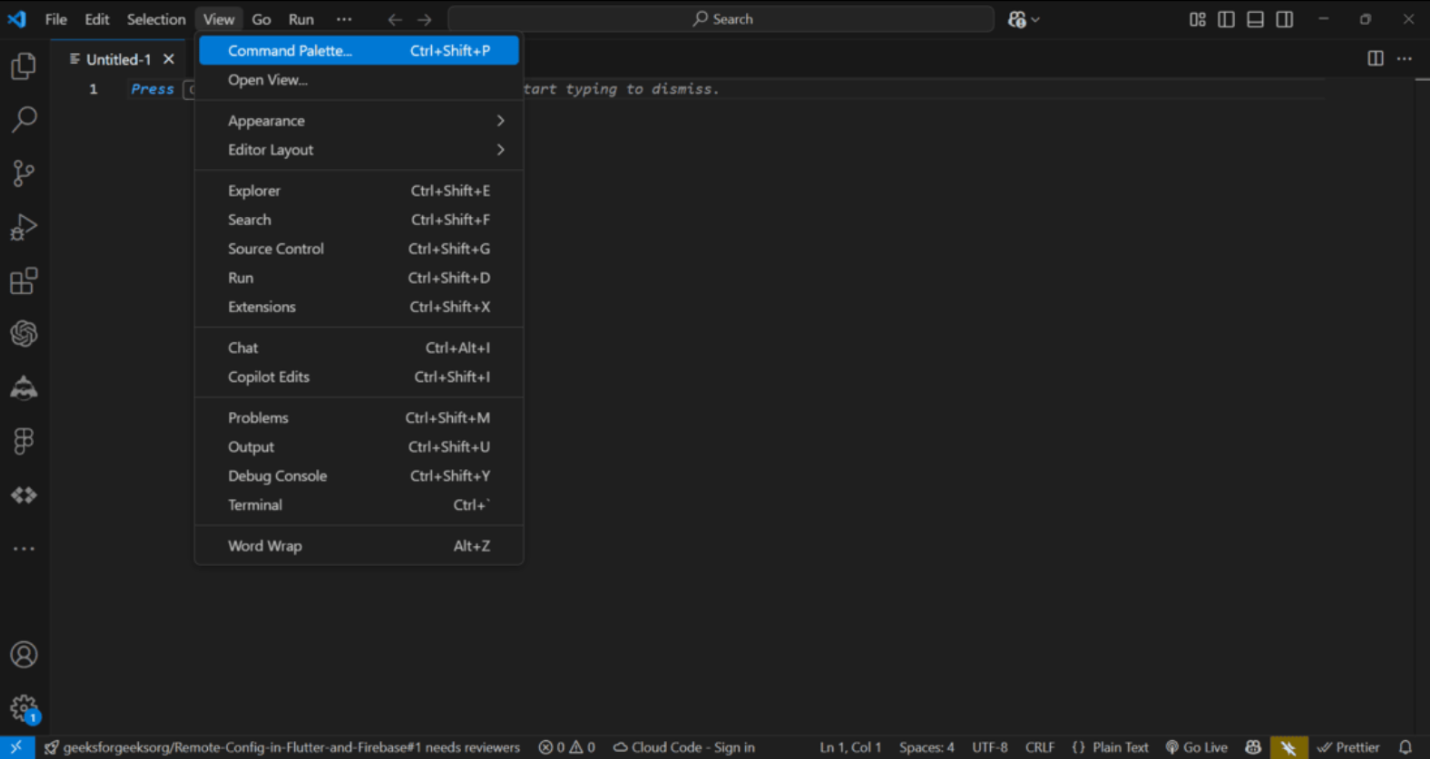
Step 3: Search for and select “Flutter: New Project.”
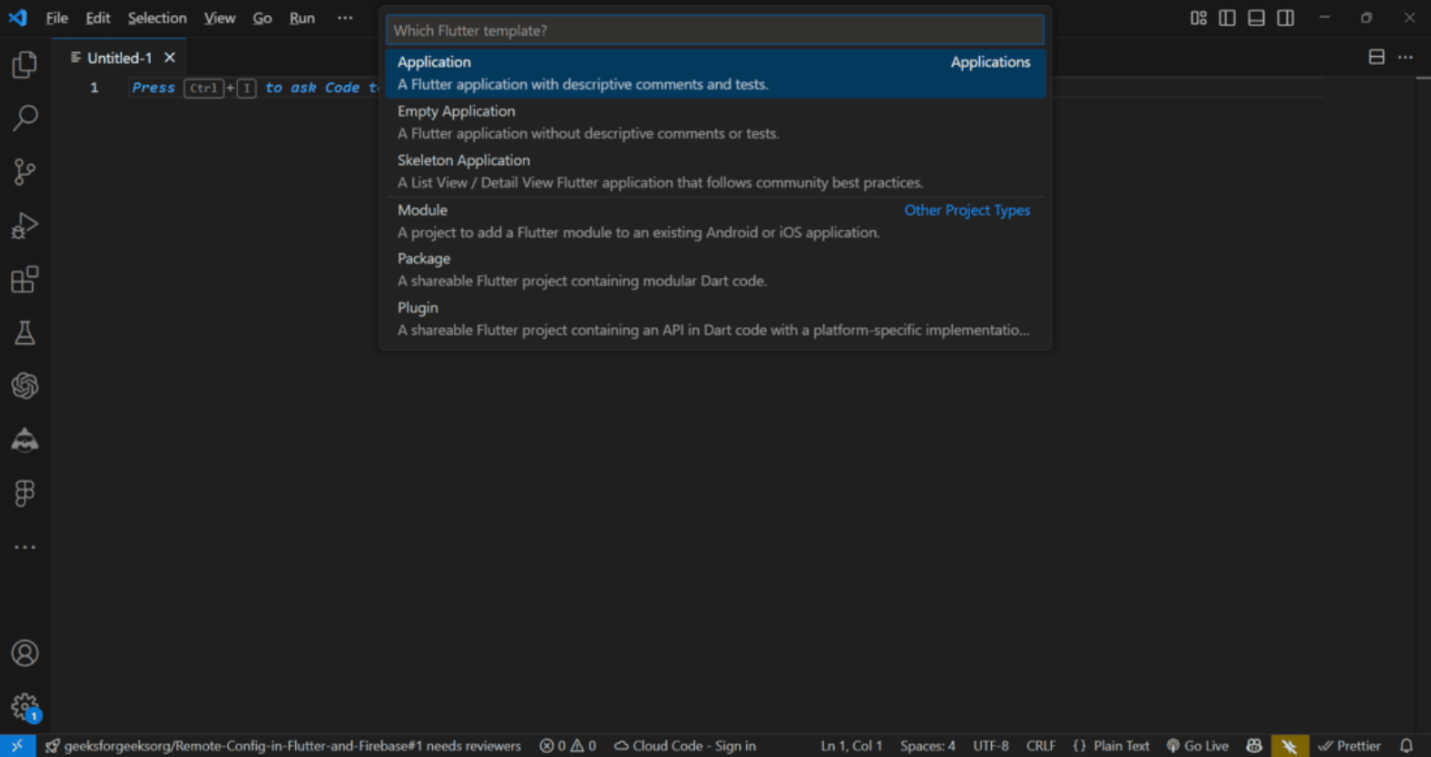
Step 4: Choose “Flutter Application” as the project type.
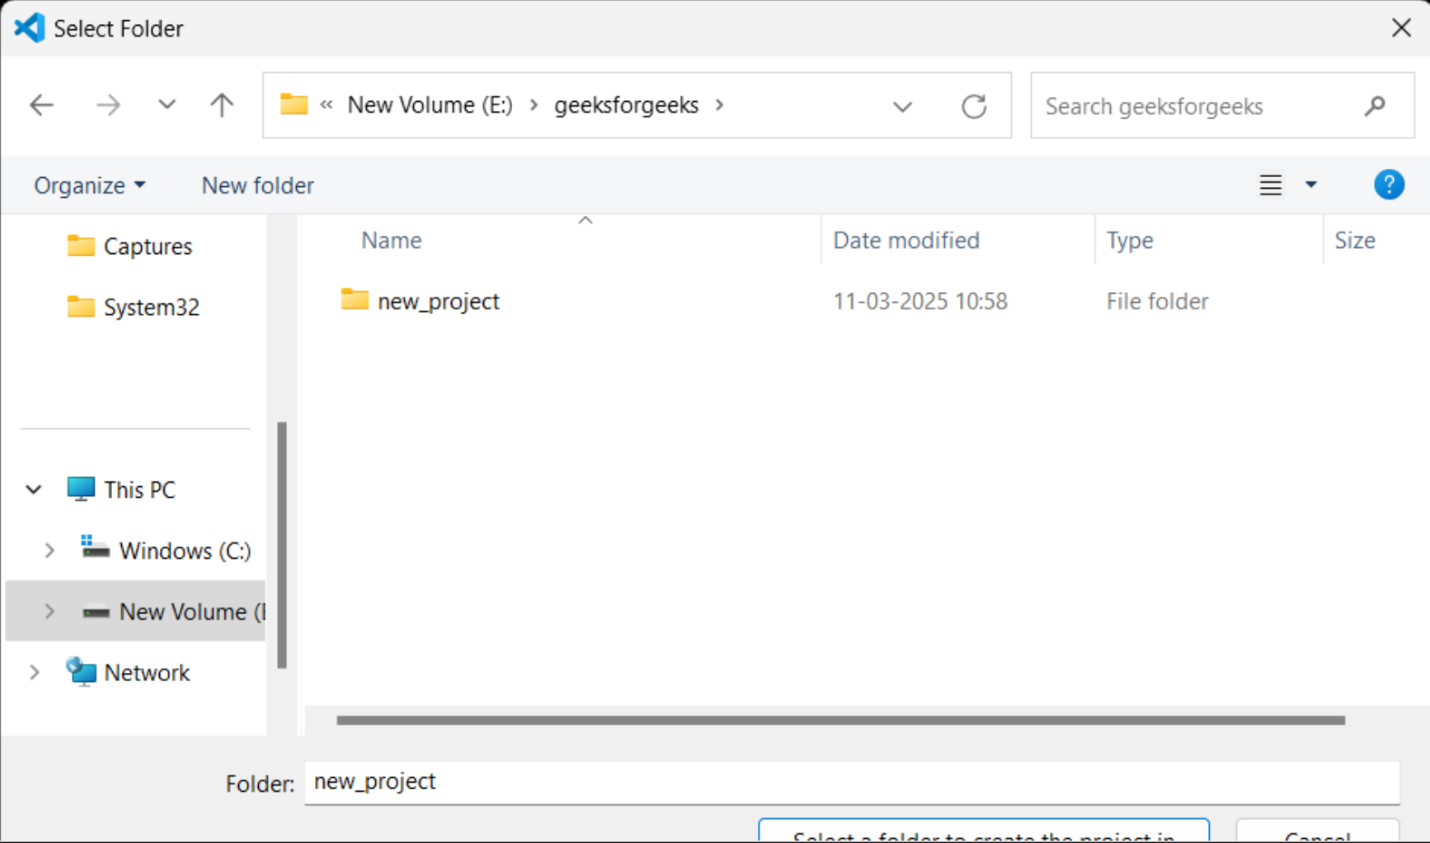
Step 5: Choose or create an empty folder where the project will be saved.
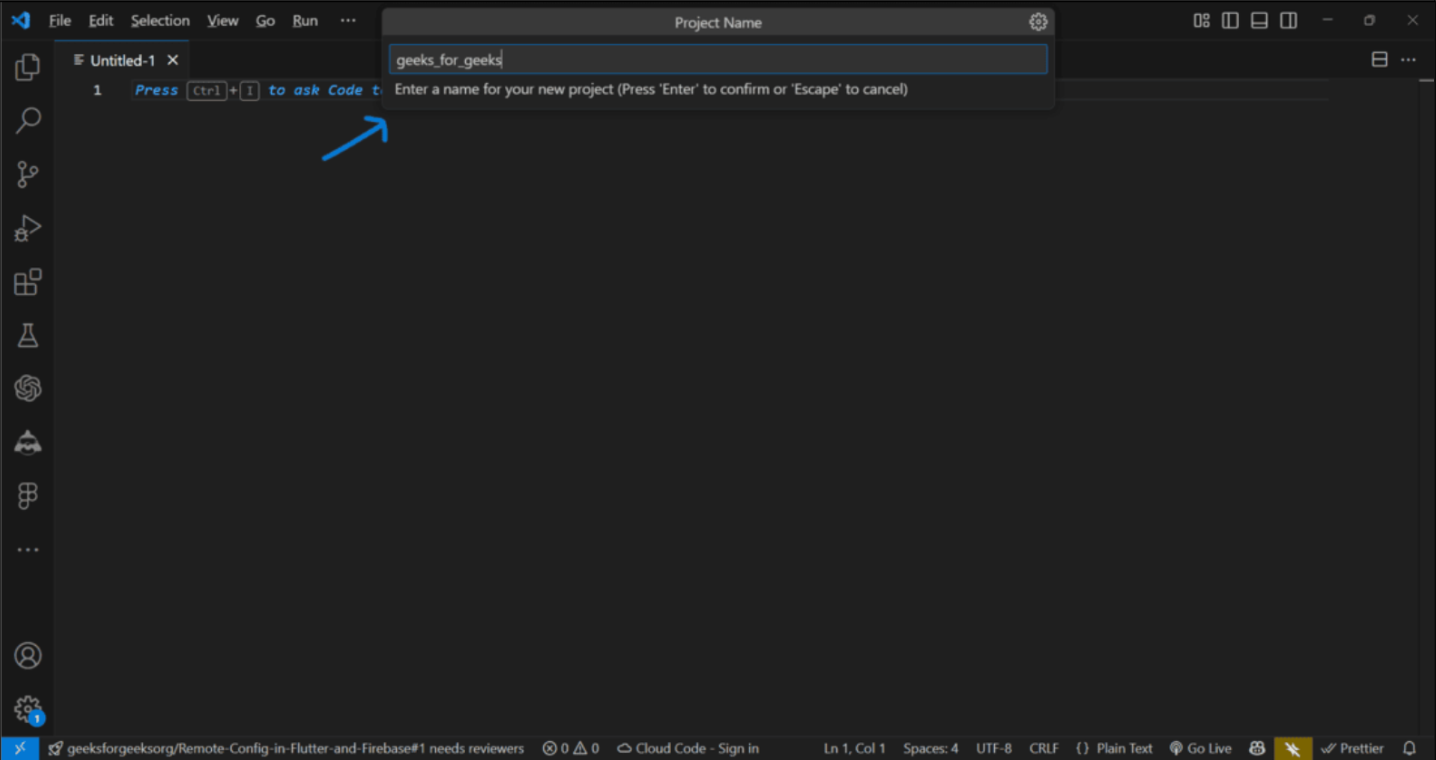
Step 6: Enter a name for your project and press Enter.
Step 7: Visual Studio Code will generate all the necessary files for your project. Now, open main.dart located at lib/main.dart in your project folder.
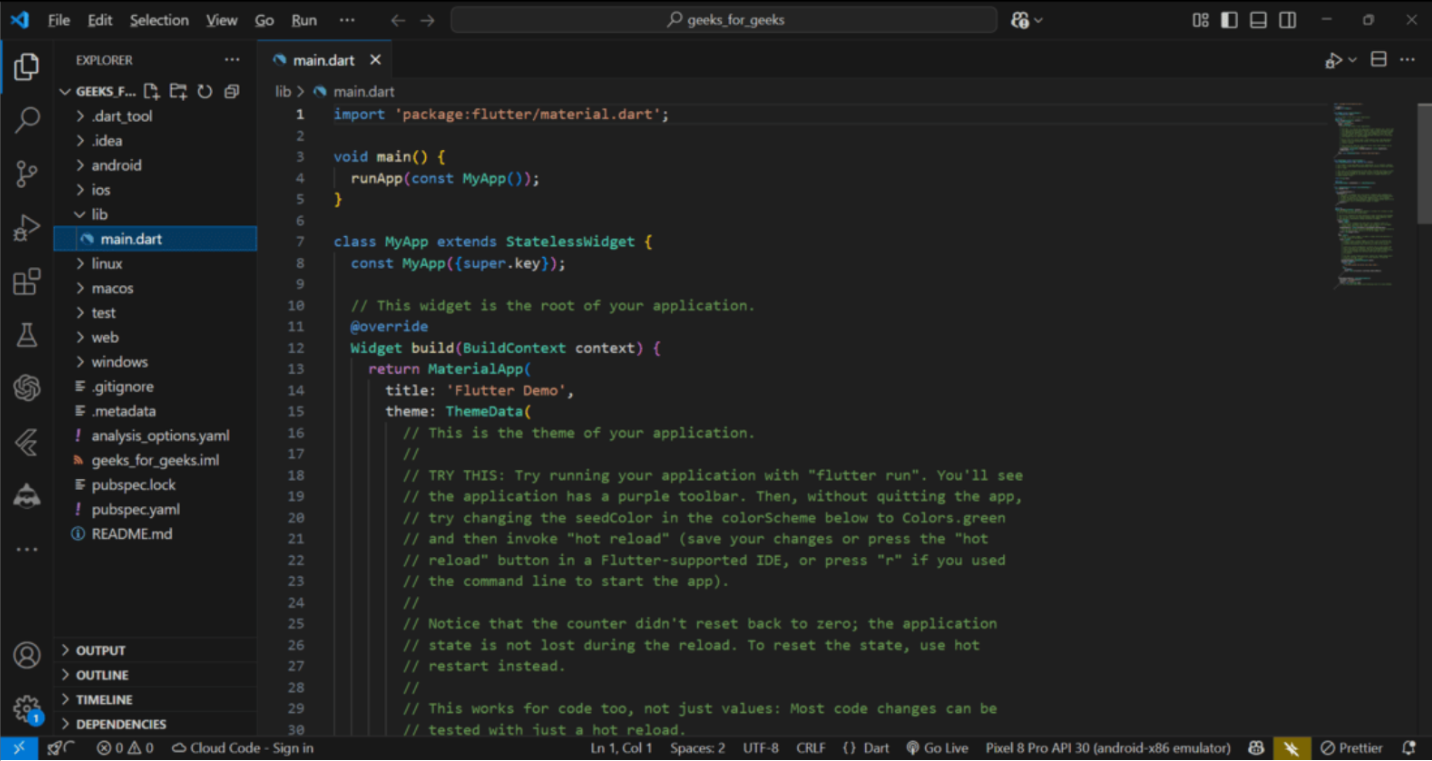
Step 8: Replace the existing code in main.dart with the code below:
main.dart:
// Importing important packages require to connect
// Flutter and Dart
import 'package:flutter/material.dart';

// Main Function
void main() {
// Giving command to runApp() to run the app.

// The purpose of the runApp() function is to attach
// the given widget to the screen.
runApp(const MyApp());
}

// MyApp extends StatelessWidget and overrides its
// build method.
class MyApp extends StatelessWidget {
const MyApp({Key? key}) : super(key: key);

// This widget is the root of your application.
@override
Widget build(BuildContext context) {
return MaterialApp(

// title of the application
title: 'Hello World Demo Application',

// theme of the widget
theme: ThemeData(
primarySwatch: Colors.lightGreen,
),

// Inner UI of the application
home: const MyHomePage(title: 'Home page'),
);
}
}

// This class is similar to MyApp instead it
// returns Scaffold Widget
class MyHomePage extends StatelessWidget {
const MyHomePage({Key? key, required this.title}) : super(key: key);
final String title;

@override
Widget build(BuildContext context) {
return Scaffold(
appBar: AppBar(
title: Text(title),
backgroundColor: Colors.green,
foregroundColor: Colors.white,
),

// Sets the content to the
// center of the application page
body: const Center(

// Sets the content of the Application
child: Text(
'Welcome to Visual Studio Code!',
)),
);
}
}Output: This code will display an app with a green app bar and a message saying, "Welcome to Visual Studio Code!"
