Creating assignments on Moodle helps instructors share coursework in a clear and organized way. It allows instructors to collect learner work, track progress, and maintain everything in a single place. When assignments are set up properly, learners know exactly what is expected and where to submit their tasks. This introduction sets the purpose for understanding how creating the assignment supports uninterrupted teaching and learning on Moodle.
Prerequisites
Before creating an assignment, make sure the basic course setup and user access are ready:
- You have a teacher or course creator role with editing rights in the course.
- The course is visible to students.
- You have editing mode turned on.
- Students are enrolled in the course and have permission to submit assignments.
- The course upload limit supports expected file sizes, especially for media submissions.
- File format instructions and grading criteria are already planned.
Having these elements in place ensures the assignment works uninterrupted from both the instructor and learner sides.
Creating Assignments on Moodle
Creating assignments on Moodle allows instructors to collect learners’ work in an organized and trackable way. This section focuses on how assignment setup supports clear submission expectations, structured evaluation, and uninterrupted interaction between instructors and learners. It will allow you to set the foundation for managing coursework effectively within the platform.
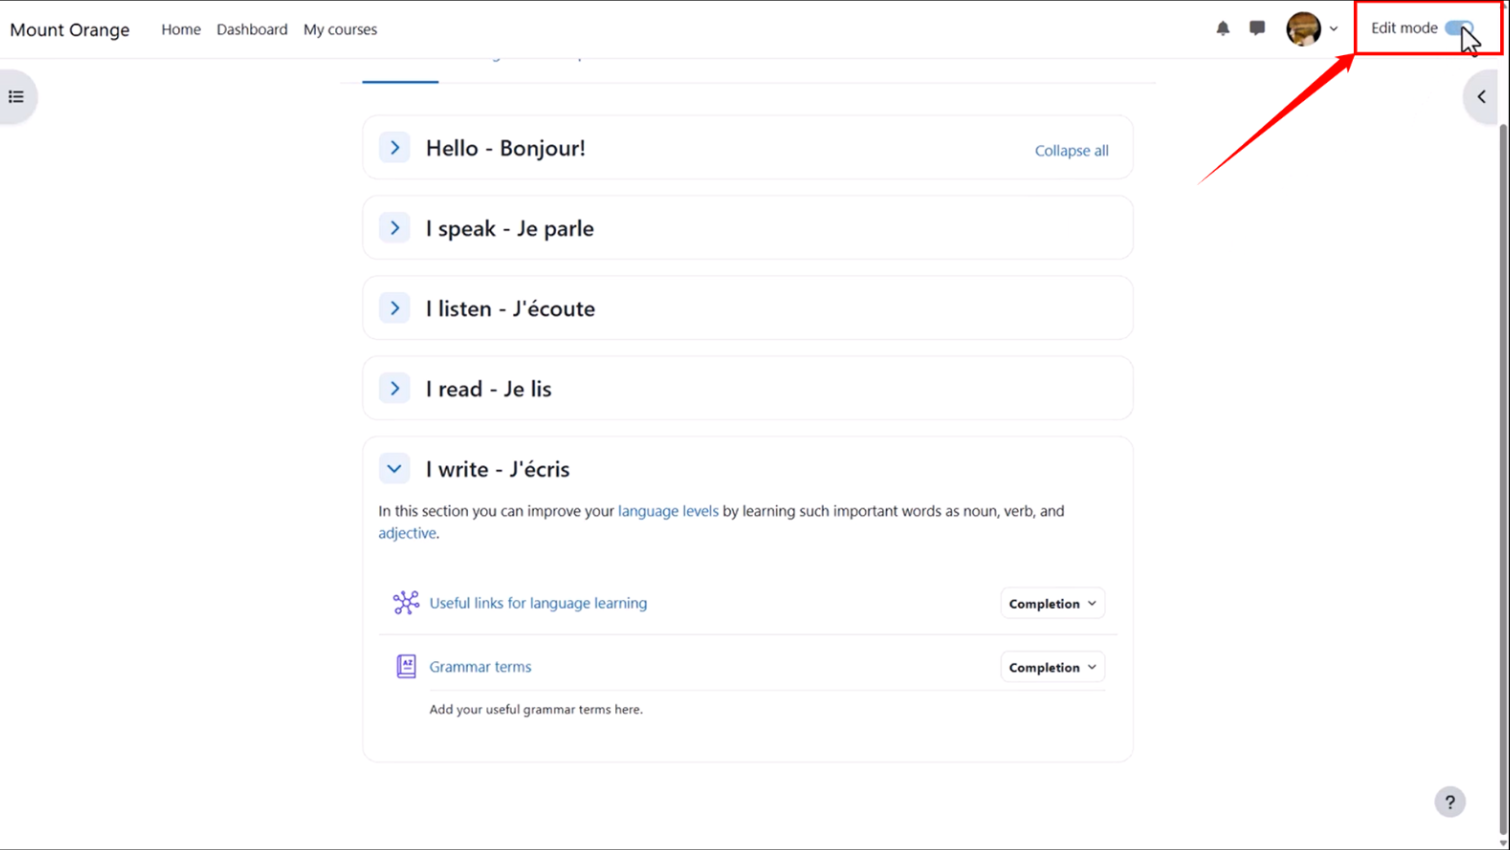
Step 1: Log in to your institution’s Moodle site and open the course where you want to create the assignment. Then click the “Edit mode” toggle at the top right of the page to enable editing.
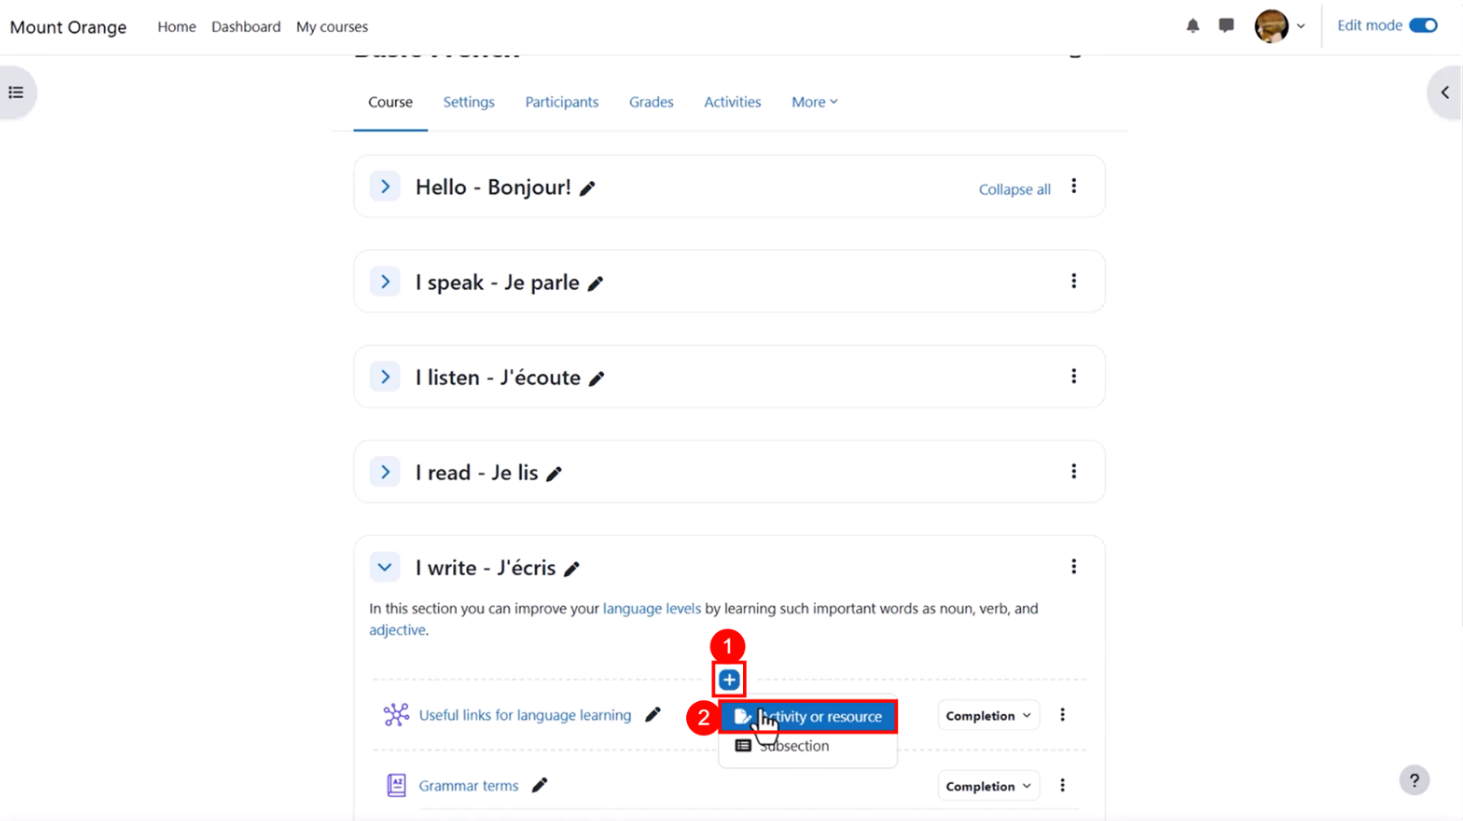
Step 2: Go to the section of the course page where the assignment will appear. Click the “+” icon, then select the “Activity or resource” option.
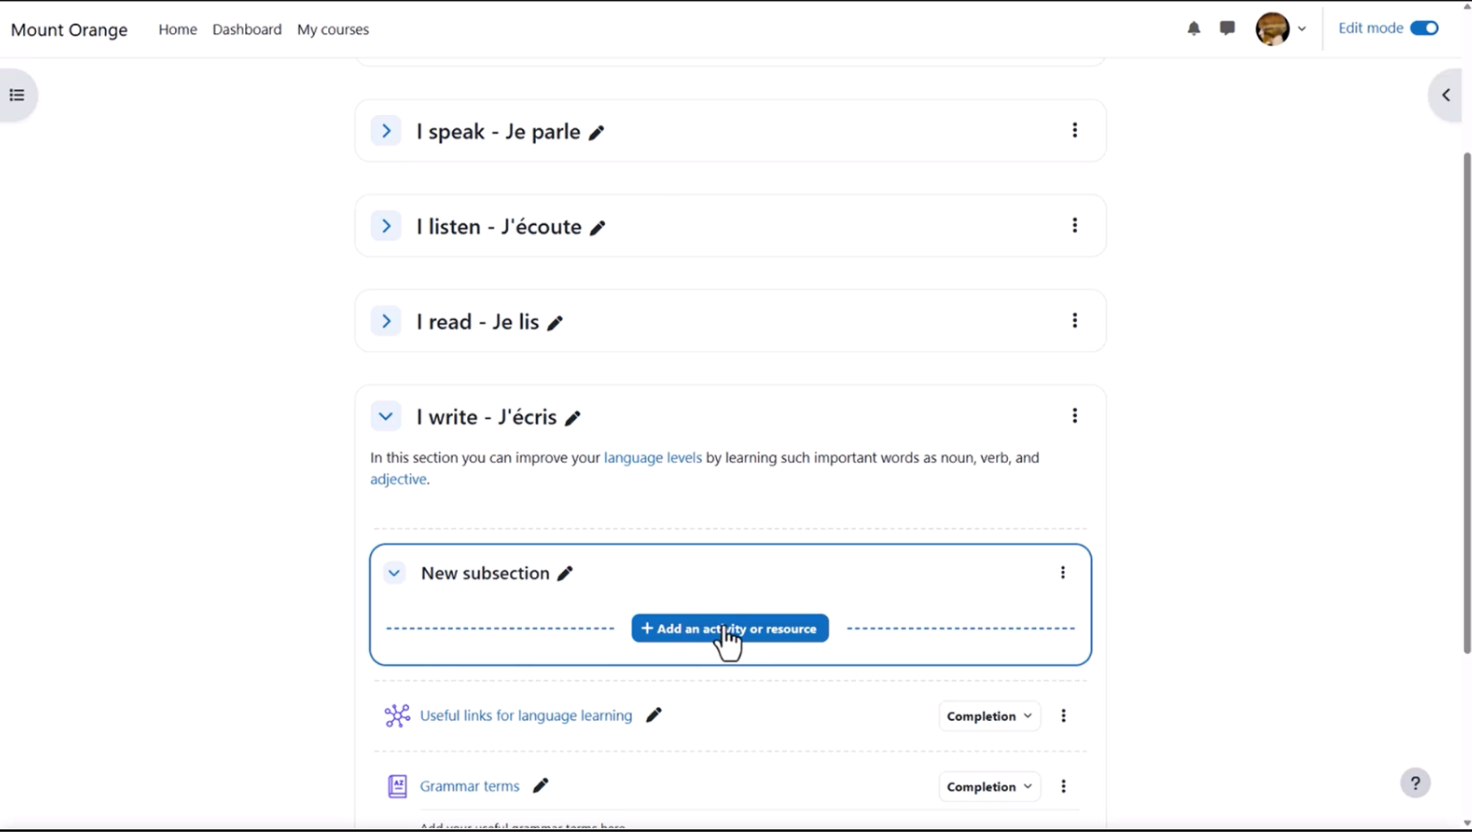
Step 3: A new subsection will be created. Click on the “+ Add an activity or resource” button.
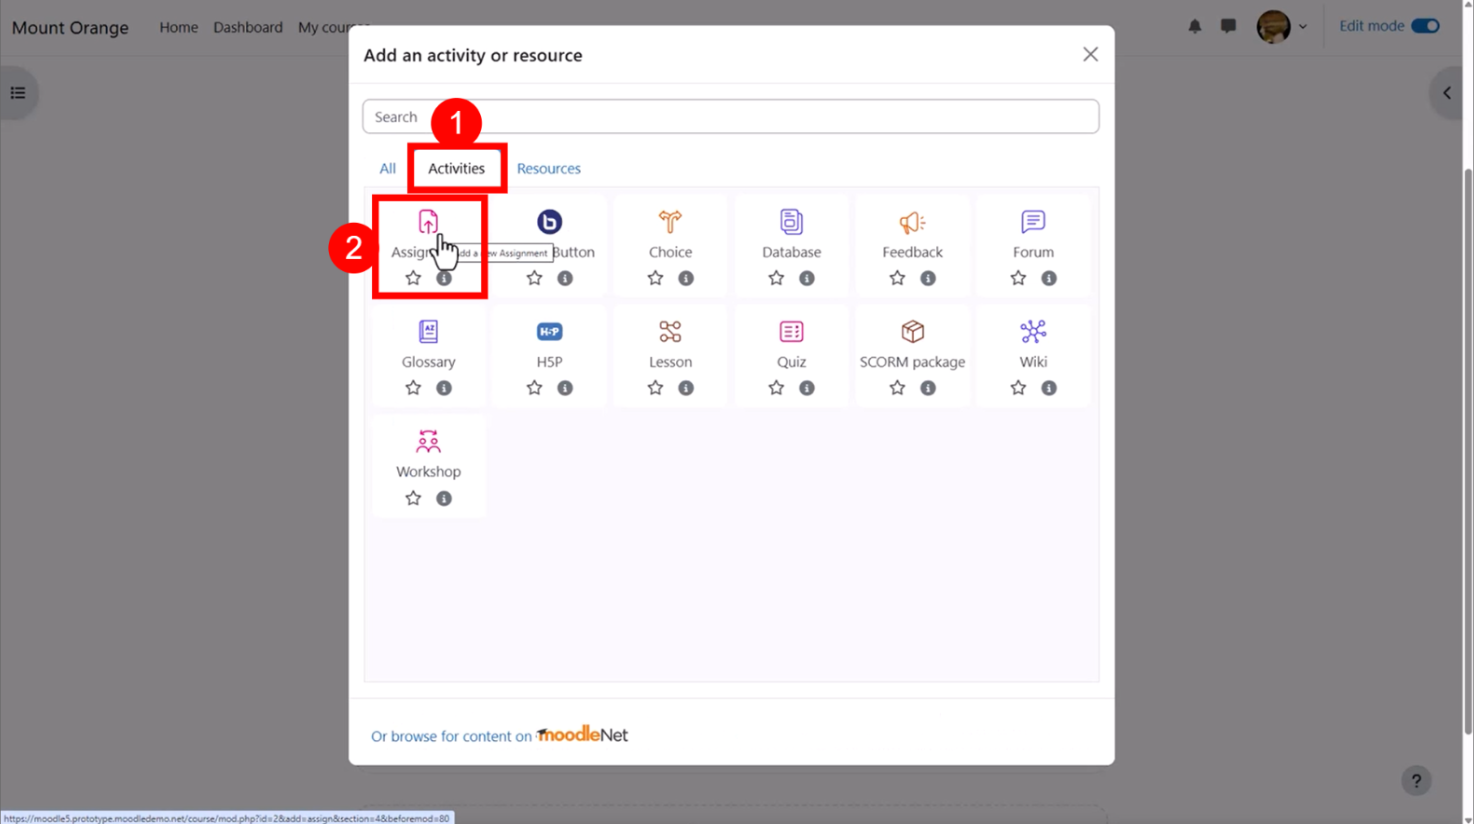
Step 4: In the modal window that appears, open the “Activities” tab and select the “Assignment” option.
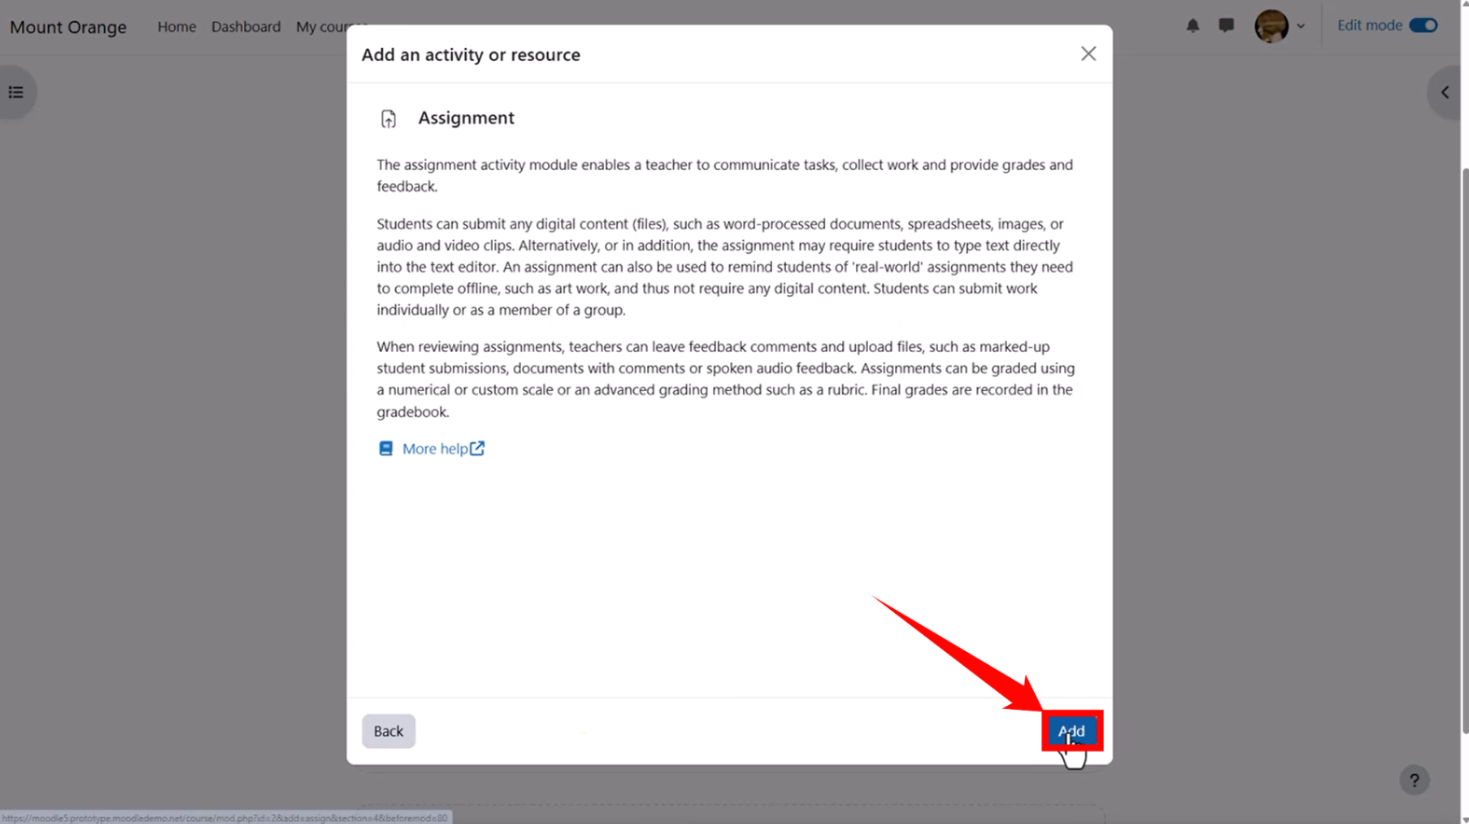
Step 5: An “Add an activity or resource” modal will open. Click on the “Add” option, located in the bottom right corner of the modal.
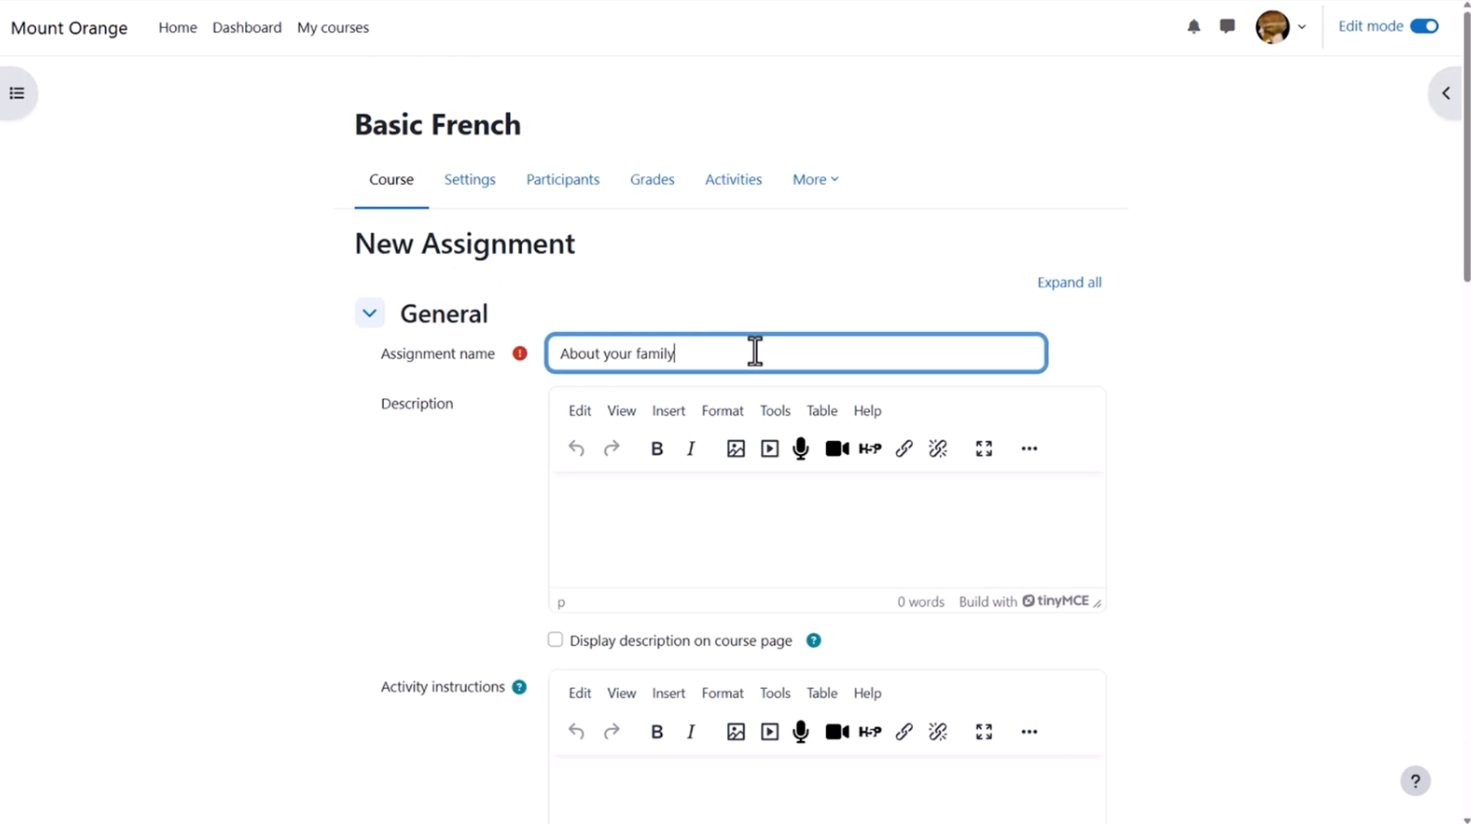
Step 6: A new assignment setup page will open. Enter a clear, descriptive assignment name, such as “Week 2: Video Project.”
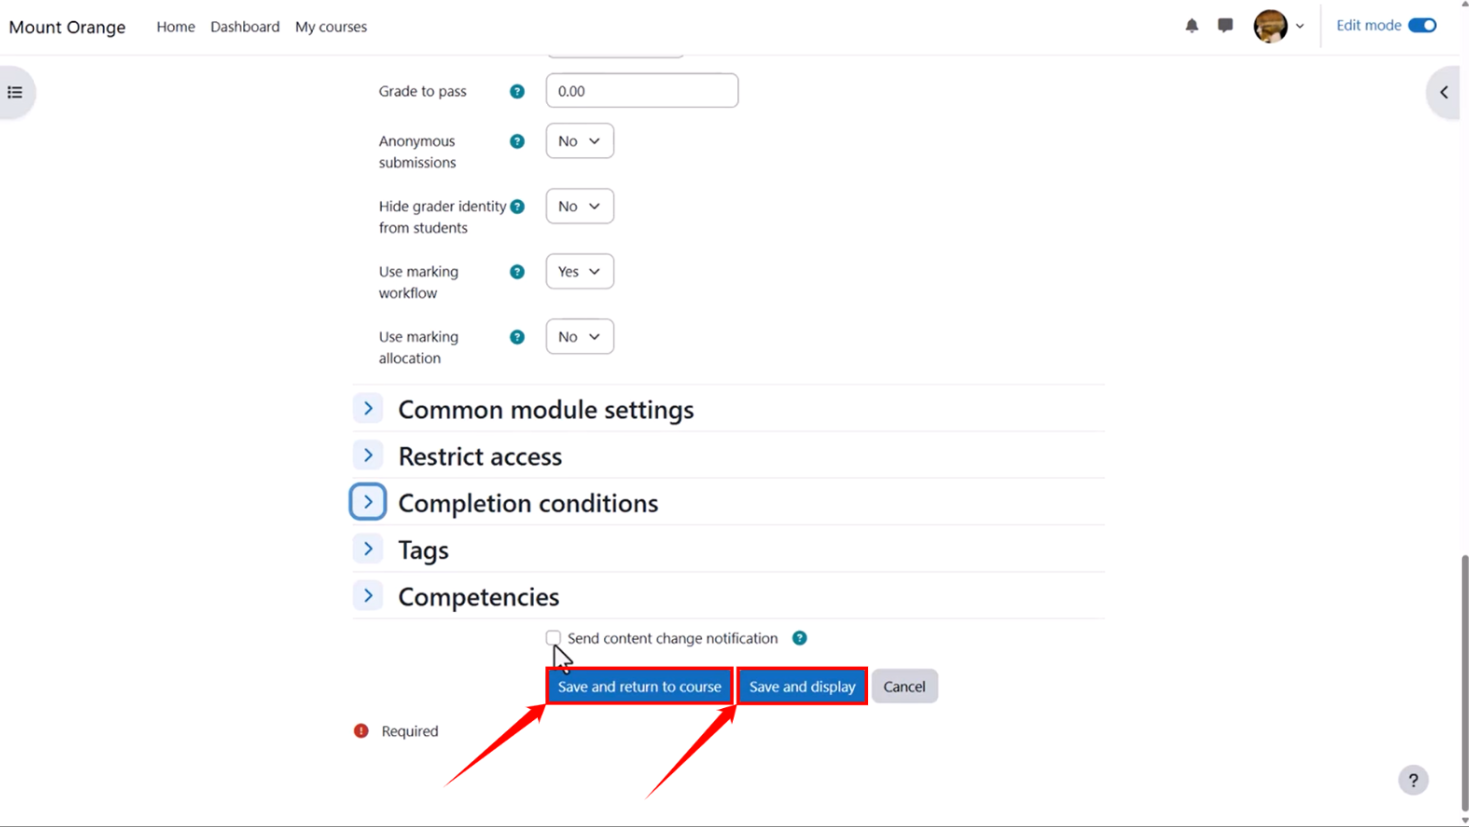
Step 7: After filling in the necessary details, tick the “Send content change notification” checkbox if you want to notify the learners about the change.

Step 8: After completing the configuration, click on the “Save and display” button to save and view the changes. Otherwise, click on the “Save and return to course” button if you want to save the changes but don’t want to view them.
Note: This is how it will appear to you after saving the changes.
