Setting up JW Player with AWS-hosted video assets enables scalable and secure delivery of on-demand video. This guide outlines a production-grade integration that includes S3 storage, CloudFront delivery, JW Player embedding, automated transcoding, DRM, quality switching, responsive UI, and access control.
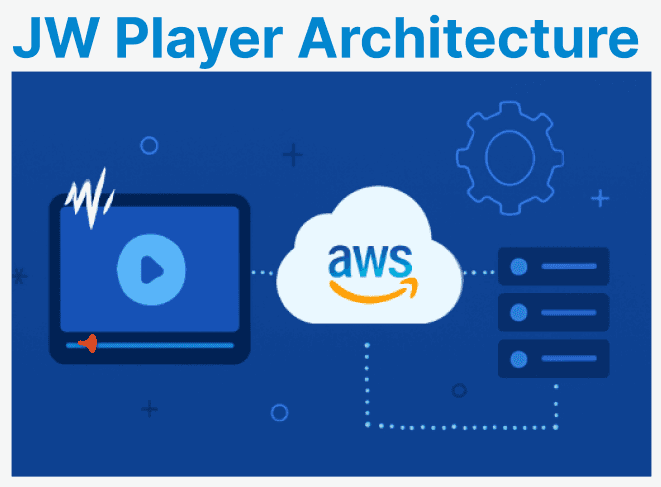
Overview of Architecture
This architecture leverages AWS services and the JW Player Web SDK to enable video storage, transcoding, and streaming. Key components include Amazon S3 for storage, CloudFront for global delivery, AWS MediaConvert for transcoding, and JW Player for video playback.

- Amazon S3: Stores video files, including MP4, HLS segments, and thumbnails. S3 offers highly scalable and durable object storage.
- Amazon CloudFront: Serves as the CDN (Content Delivery Network) for global video delivery, reducing latency and improving load times.
- AWS MediaConvert: Transcodes videos into formats like HTTP Live Streaming or Dynamic Adaptive Streaming over HTTP for adaptive bitrate streaming.
- JW Player Web SDK: Embeds the video player on your site or app, enabling rich video playback with support for features like analytics, DRM, and quality switching.
- Access Control: CloudFront signed URLs provide secure, time-limited access to video content, ensuring only authorized users can view it.
Uploading Video to Amazon S3
Uploading video content to Amazon S3 makes it available for streaming via CloudFront. S3 acts as the origin storage for video files, whether they are raw MP4 files or segmented HLS content. After uploading, CloudFront can serve these videos to end users with minimal latency.
Step 1: Create the S3 Bucket
Create a new S3 bucket where your video files will be stored. S3 buckets are used to organize and store data. By creating a new bucket, you can isolate video content for your streaming purposes. Run the following command to create the bucket:
aws s3 mb s3://my-video-bucketStep 2: Upload Raw Video Files
Once the bucket is created, you can upload your video files. This example uses a basic MP4 file as input. The aws s3 cp command allows you to copy files from your local machine to the specified S3 bucket. Use the following command to upload a raw MP4 file:
aws s3 cp ./originals/sample.mp4 s3://my-video-bucket/uploads/sample.mp4Step 3: Set Public Read Access (Only for Public Content)
If your content is intended to be publicly accessible, you can set the appropriate permissions using the aws s3api put-object-acl command. This will make the video publicly accessible via CloudFront. However, configure signed URLs to control access if the video should be restricted. To set public read access on the uploaded video, run:
aws s3api put-object-acl --bucket my-video-bucket --key uploads/sample.mp4 --acl public-readThumbnail Generation (Preview Images)
Generating video thumbnails is a crucial step for providing visual previews before the video starts playing. Thumbnails serve as static images that give users a preview of the video content, making it easier to engage with the video. FFmpeg is a powerful tool for generating these thumbnails.
Step 1: Generate Thumbnail
FFmpeg allows you to extract a frame from a specific timestamp in a video and save it as an image file. This command helps you generate a quality thumbnail from a specified time in the video, which can be displayed as a preview. The command to generate a thumbnail from the third second of the video is:
ffmpeg -i sample.mp4 -ss 00:00:03 -vframes 1 -vf scale=640:-1 thumbnail.jpgStep 2: Upload Thumbnail to S3
Once the thumbnail is generated, it needs to be uploaded to your storage system, typically Amazon S3, for use in your video player. Uploading the thumbnail allows it to be accessed alongside the corresponding video file. Use the following AWS CLI command to upload the thumbnail image to your S3 bucket:
aws s3 cp thumbnail.jpg s3://my-video-bucket/thumbnails/sample.jpgTranscoding with AWS MediaConvert
Adaptive bitrate streaming is essential for delivering high-quality video content to users across varying network conditions. AWS MediaConvert simplifies this process by transcoding video files into formats. This process involves converting the video file into smaller segments and generating a playlist.
Step 1: MediaConvert Job Configuration (HLS)
Before starting the transcoding process, you need to create a MediaConvert job configuration file. This configuration file specifies the input video file, the desired output format (HLS in this case), and where the transcoded files should be stored.
Create the JSON Job Configuration File:
This JSON file will contain all the necessary configurations for transcoding the video. It defines the input file, the output settings, and the codec to be used. Example JSON configuration for HLS:
{"Settings": {"Inputs": [{"FileInput": "s3://my-video-bucket/uploads/sample.mp4"}],"OutputGroups": [{"Name": "HLS Group","OutputGroupSettings": {"Type": "HLS_GROUP_SETTINGS","HlsGroupSettings": {"Destination": "s3://my-video-bucket/hls/sample/"}},"Outputs": [{"VideoDescription": {"Width": 1280,"Height": 720,"CodecSettings": {"Codec": "H_264"}},"ContainerSettings": {"Container": "M3U8"}}]}]}}Explanation:
- "Settings": {...}: Defines the main settings for the transcoding job, specifying input and output configurations.
- "Inputs": [{ "FileInput": "s3://my-video-bucket/uploads/sample.mp4" }]: Specifies the source file (video) to be transcoded, stored in an S3 bucket.
- "OutputGroups": [{ "Name": "HLS Group", "OutputGroupSettings": {...} }]: Defines the output group for the transcoded content, named "HLS Group", specifying settings related to HLS.
- "HlsGroupSettings": { "Destination": "s3://my-video-bucket/hls/sample/" }: Specifies the destination in the S3 bucket where the transcoded HLS files will be stored.
- "Container": "M3U8": Defines the container format for the HLS output as M3U8, which is used for HLS streaming.
Step 2: Submit the MediaConvert Job
Once the job configuration is ready, the next step is to submit the job to AWS MediaConvert for processing. This will trigger the transcoding process, where the video will be encoded into the HLS format.
Submit the Transcoding Job:
Use the AWS CLI to submit the job by pointing to the JSON configuration file you just created. The following command initiates the transcoding process:
aws mediaconvert create-job --region us-east-1 --endpoint-url https://abcd.mediaconvert.us-east-1.amazonaws.com --cli-input-json file://job.json
Transcoding Process:
After submitting the job, AWS MediaConvert processes the video and transcodes it into the HLS format, breaking the video into smaller segments. The output files (M3U8 playlist and .ts video segments) are then stored in the specified S3 location (s3://my-video-bucket/hls/sample/).
CloudFront Setup for Video Delivery
Amazon CloudFront is a Content Delivery Network that enhances video streaming by caching and distributing content across multiple locations worldwide. This reduces latency and improves load times for end users. By configuring CloudFront to deliver video content, you can optimize the streaming experience while ensuring that your content is efficiently distributed.
Step 1: Create CloudFront Distribution
The first step in using CloudFront for video delivery is to create a CloudFront distribution. A distribution is the setup that allows CloudFront to serve content from your origin. When creating the distribution, you'll specify the origin and configure the viewer certificate for secure delivery.
Creating the Distribution:
Use the AWS CLI to create the CloudFront distribution by specifying the origin domain, add the SSL certificate for HTTPS delivery, and set the default root object. By creating the distribution, CloudFront will start caching your video content and will serve it from edge locations.
aws cloudfront create-distribution --origin-domain-name my-video-bucket.s3.amazonaws.com --viewer-certificate ACMCertificateArn=your-certificate-arn --enabled --default-root-object video.mp4Step 2: CloudFront Cache and CORS Setup
To further optimize the performance and security of video delivery, you need to configure Cache Time-to-Live and Cross-Origin Resource Sharing settings. To ensure proper caching and delivery, configure Cache TTL and CORS policy for video files:
Cache TTL (Time-to-Live)
TTL is a setting that determines how long CloudFront should cache your content at the edge before checking for updates. For video files, you can set a long TTL to reduce the load on your origin and improve delivery performance for end users. For example:
- Cache TTL: Set to a value that reflects the frequency of video updates. For videos that rarely change, you can set a long TTL (e.g., 1 day) to ensure that content is cached at the edge for longer periods.
- Cache Control Headers: Make sure your S3 objects have appropriate cache control headers to guide CloudFront’s caching behavior.
CORS Setup
Cross-Origin Resource Sharing is essential when your video player requests video content from a different domain. You need to configure CORS headers in CloudFront to allow video files to be served to your player from specific domains. To enable CORS for video delivery:
- Go to the CloudFront distribution settings.
- Under Cache Behavior Settings, configure the CORS policy.
- Set the AllowedOrigins to your player domain (e.g., https://www.yourwebsite.com), and allow GET and HEAD methods to ensure the video files can be accessed for playback.
Example:
{"AllowedHeaders": ["*"],"AllowedMethods": ["GET", "HEAD"],"AllowedOrigins": ["https://www.yourplayerdomain.com"],"MaxAgeSeconds": 3600}Explanation:
- "AllowedHeaders": ["*"]: Allows any headers in the incoming request, enabling cross-origin requests with any header.
- "AllowedMethods": ["GET", "HEAD"]: Specifies that only GET and HEAD methods are permitted for cross-origin requests.
- "AllowedOrigins": ["https://www.yourplayerdomain.com"]: Restricts cross-origin requests to only the specified domain.
- "MaxAgeSeconds": 3600: Sets the maximum time (1 hour) that the CORS preflight request is cached, improving performance by avoiding repeated checks.
JW Player Setup
Once the video content is uploaded to Amazon S3 and distributed globally through CloudFront, you can integrate JW Player into your web application to enable seamless video playback. JW Player is a widely used, embeddable video player that supports various video formats.
Step 1: Embed JW Player SDK
To begin, you need to include the JW Player SDK in your HTML. The SDK enables the use of JW Player’s features and functionality. To embed the SDK, insert the following script tag into the <head> or <body> section of your HTML:
<script src="https://cdn.jwplayer.com/libraries/your-library-id.js"></script> <div id="player"></div>Step 2: Initialize JW Player with HLS Source
The next step is to initialize the player with the HLS video source. This involves passing the CloudFront URL of your video (in HLS Format) to the JW Player setup function. You can also configure various player settings like thumbnail images, captions, and DRM protection.
Example:
jwplayer("player").setup({
file: "https://d123abcxyz.cloudfront.net/hls/sample/master.m3u8",
image: "https://d123abcxyz.cloudfront.net/thumbnails/sample.jpg",
type: "hls",
width: "100%",
aspectratio: "16:9",
autostart: false,
playbackRateControls: true,
tracks: [
{
file: "https://.../captions.vtt",
label: "English",
kind: "captions",
default: true
}
],
drm: {
widevine: {
url: "https://your-widevine-license-url"
}
}
});
Error Handling
To handle errors in both JW Player and S3 uploads, you can set up listeners to capture and log any issues that occur during playback and file uploads. For JW Player, use the error event to capture playback errors and log the error details using console.error. Similarly, for S3 uploads in Node.js, use the AWS SDK's s3.upload() method, where you can capture errors like permission issues or network interruptions.
Example:
// JW Player Error Logging
jwplayer("player").on("error", (err) => {
console.error("JW Player error:", err.message);
});

// S3 Upload Error Handling (Node.js)
const AWS = require("aws-sdk");
const s3 = new AWS.S3();

s3.upload(params, function (err, data) {
if (err) {
console.error("S3 Upload Failed:", err);
} else {
console.log("Upload Success:", data.Location);
}
});
Explanation:
- For JW Player, the error event captures playback issues, logging the error message to help diagnose problems like network failures or unsupported video formats.
- For S3, the s3.upload() function captures upload errors and logs them for troubleshooting, while also confirming successful uploads with the file’s location.