
Kaltura’s video editor helps turn raw recordings into polished and easy-to-watch content. It lets users trim unwanted parts, cut sections, or combine clips to improve flow; all without using any external software. Editing plays an important role in keeping videos focused, clear, and professional.
By learning how you use the Kaltura Video Editor, users can manage their videos in a more efficient way and also make sure their library stays organized, concise, and ready for sharing.
Accessing the Editor
From the Media Page
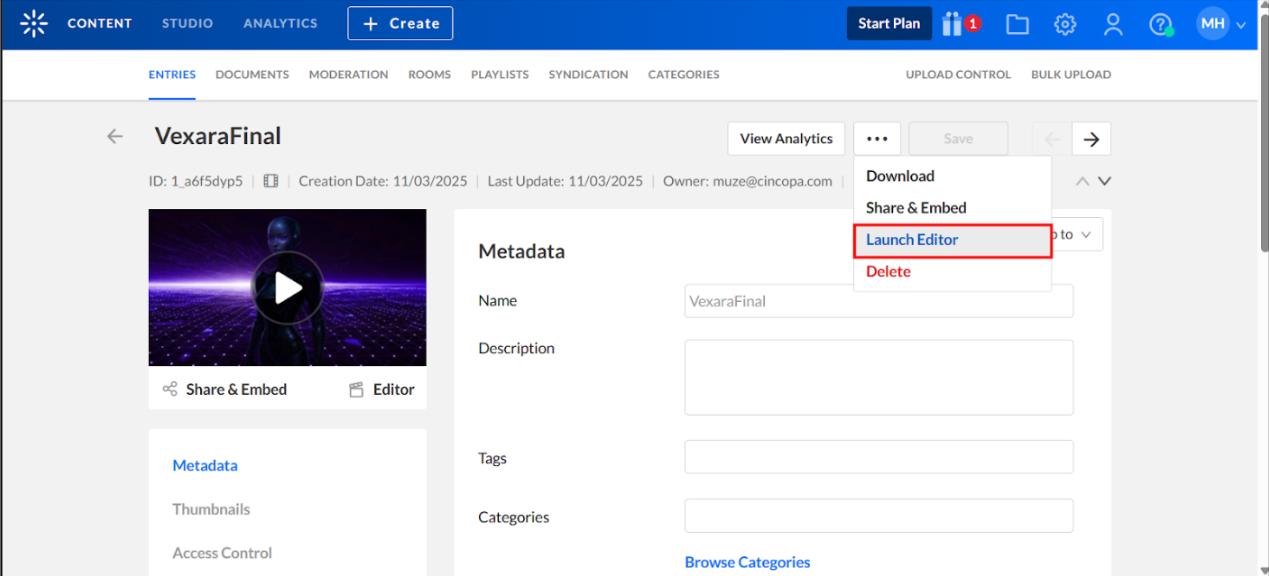
Step 1: Go to the Media Page in your Kaltura account.
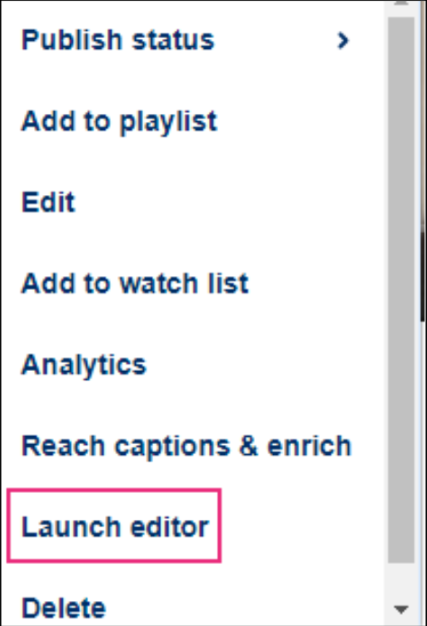
Step 2: Click the three-dot menu under the video player.

Step 3: Select the “Launch Editor” option.
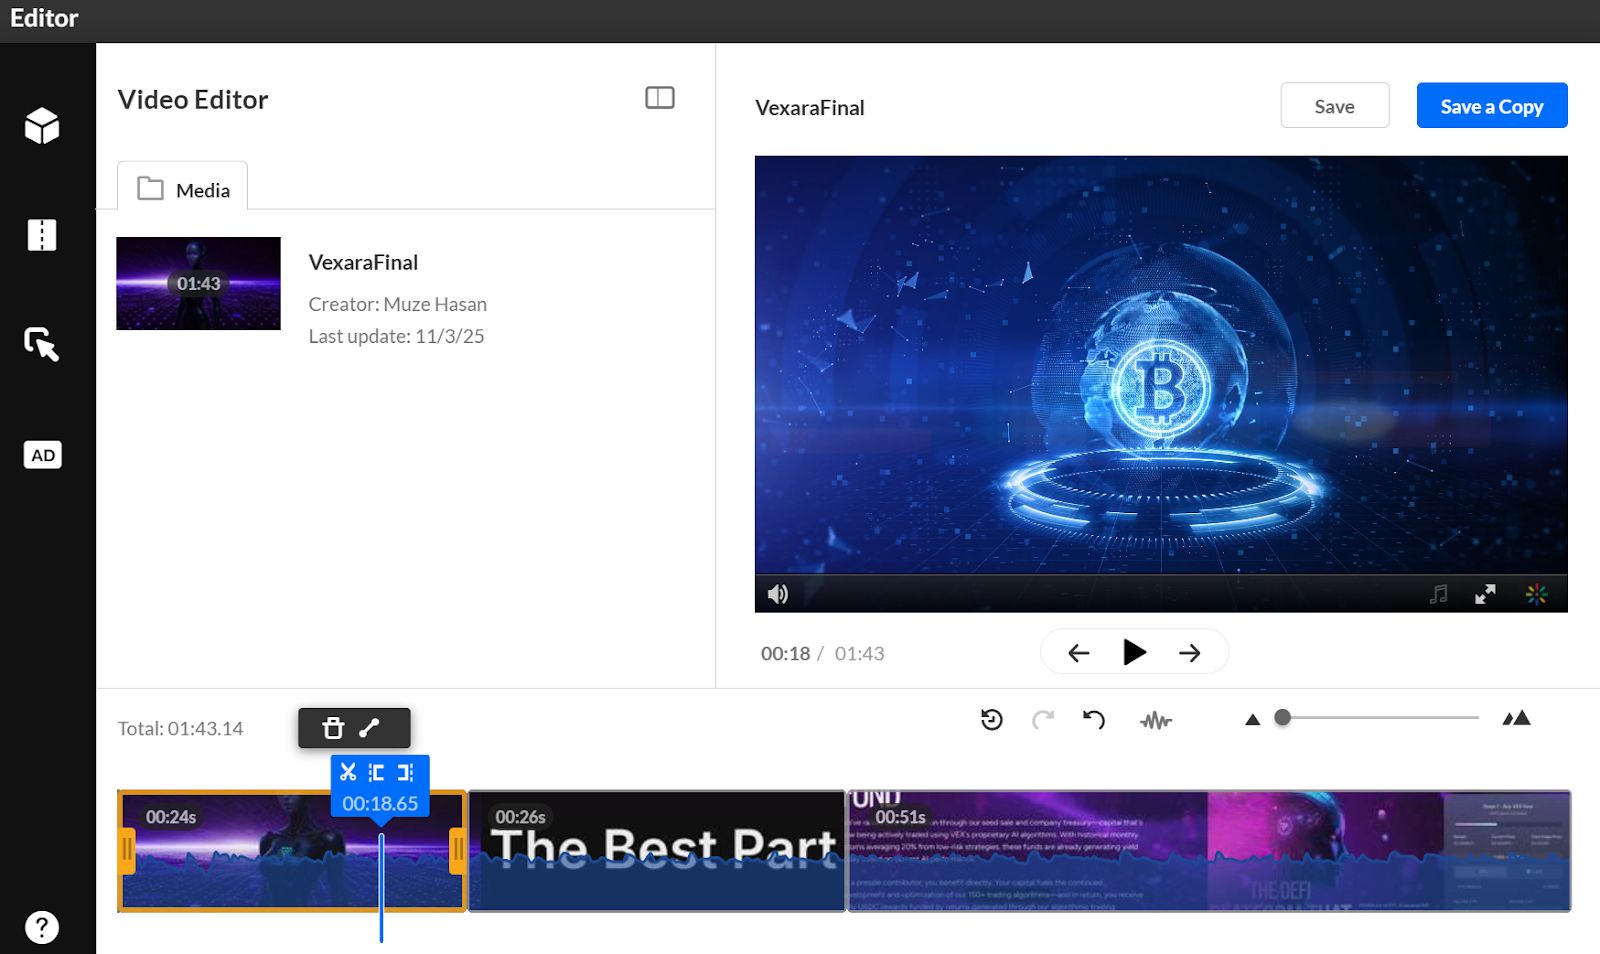
Trimming a Video
Trimming removes content from the start or end of a video. This change is permanent to the original file.
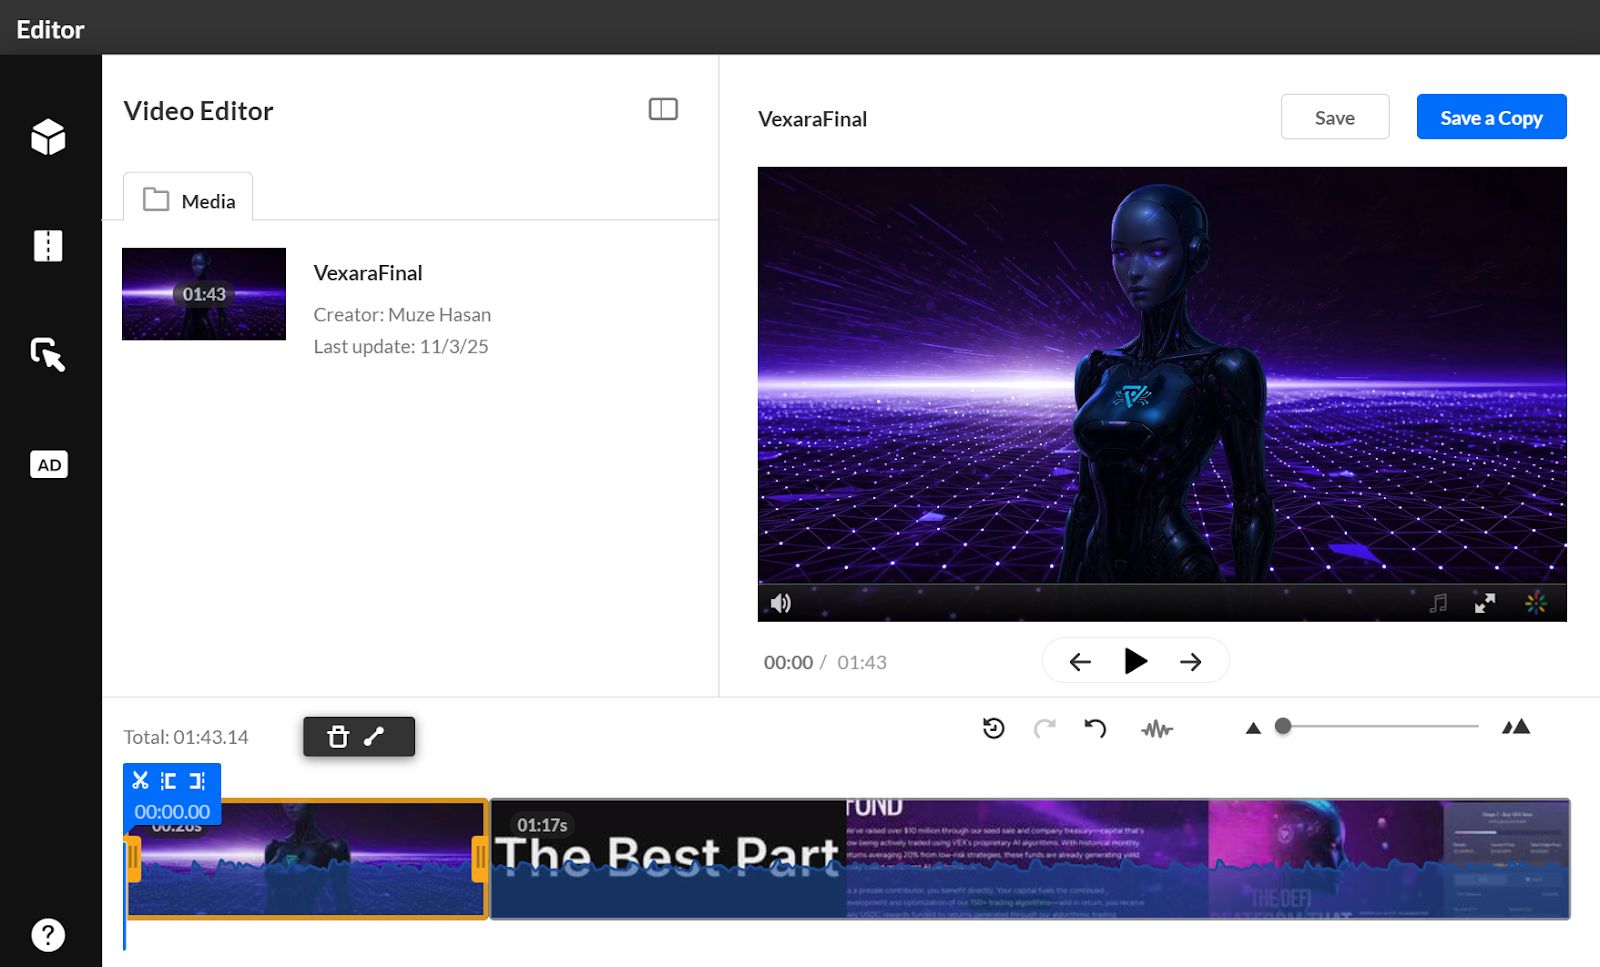
Step 1: Open the video in the editor.
Step 2: Use any of the following methods to set the trim points:
- Handlebars: Click on the timeline and drag the start and end handles.
- Split (Scissors Icon): allows you to cut the video at the point where the real-time marker is placed.
- Set In/Out Icons: Move the marker to the desired timestamp and click Set In or Set Out.
Step 3: Click on the “Save” button.
- Confirm the prompt to overwrite the media.
- Saving may take time depending on the video length.
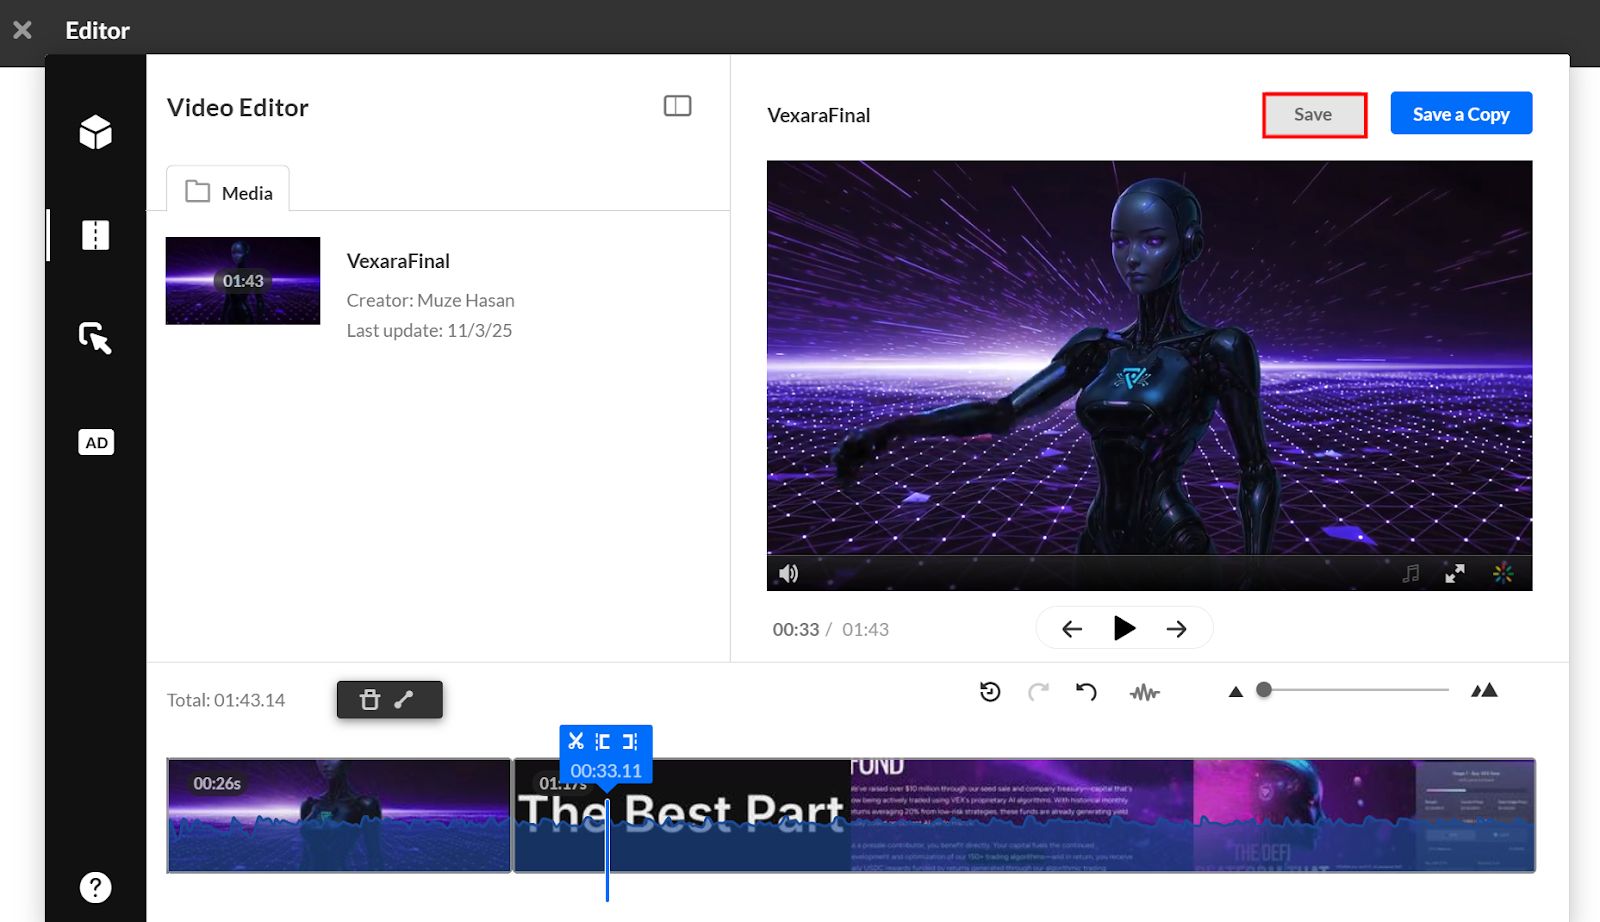
The edited video appears in My Media once processing completes.

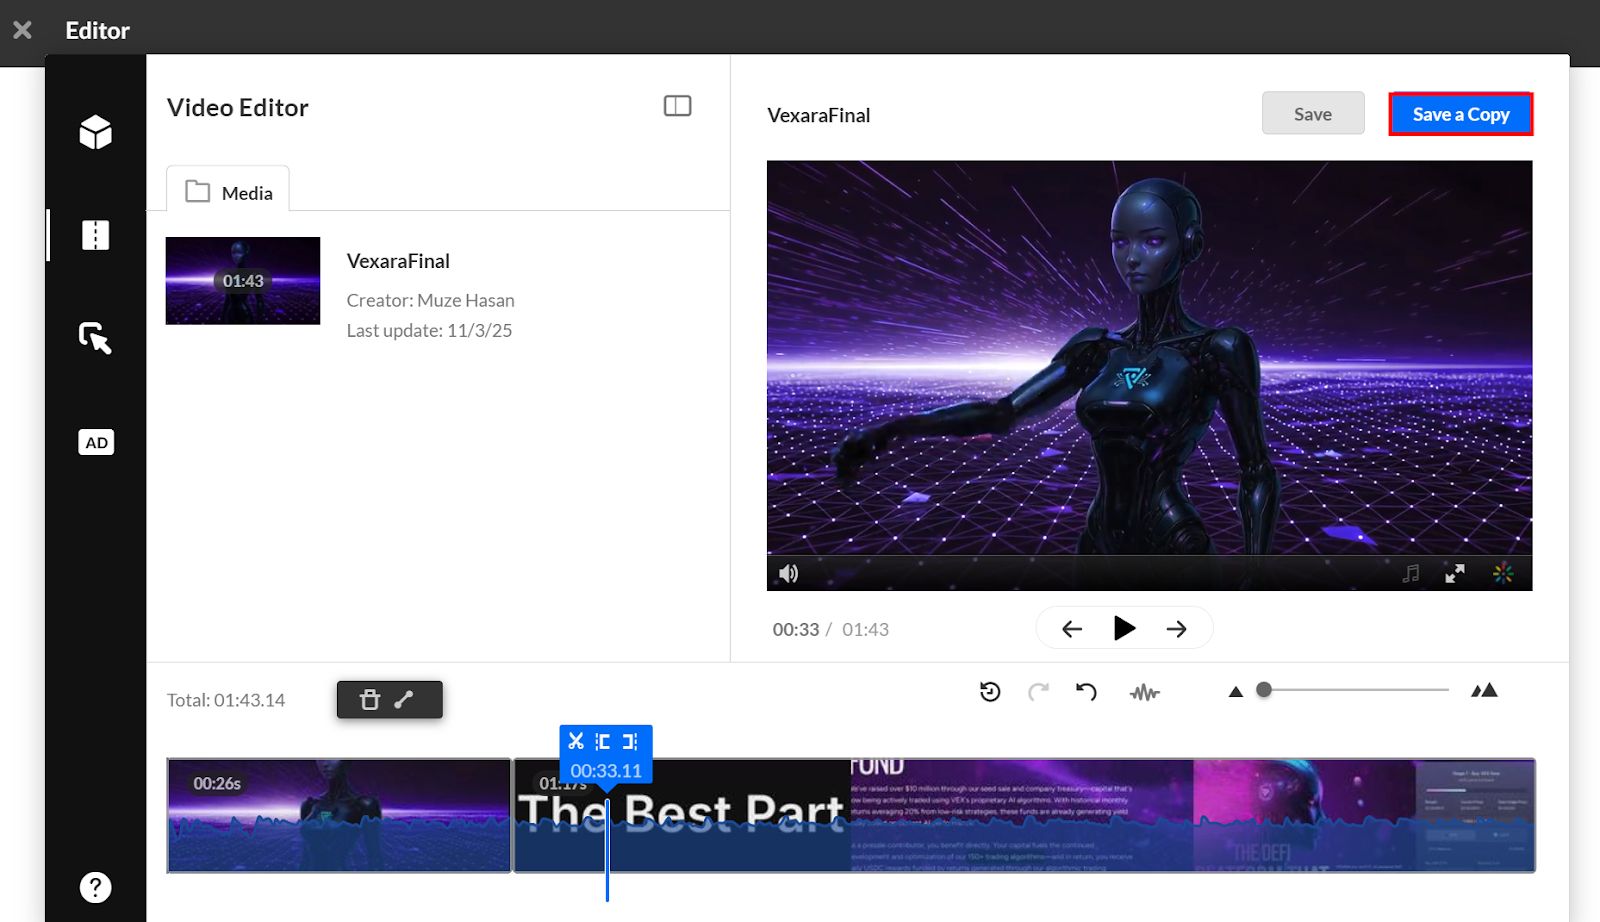
Creating a Clip
Clipping generates a new copy of the video with a defined start and end, leaving the original intact.
Step 1: Open the video in the editor.
Step 2: Set the clip range using the same methods as trimming.
Step 3: Click on the “Save a Copy” button.
Step 4: In the dialog box, enter a title for the new clip or use the default suggested title.
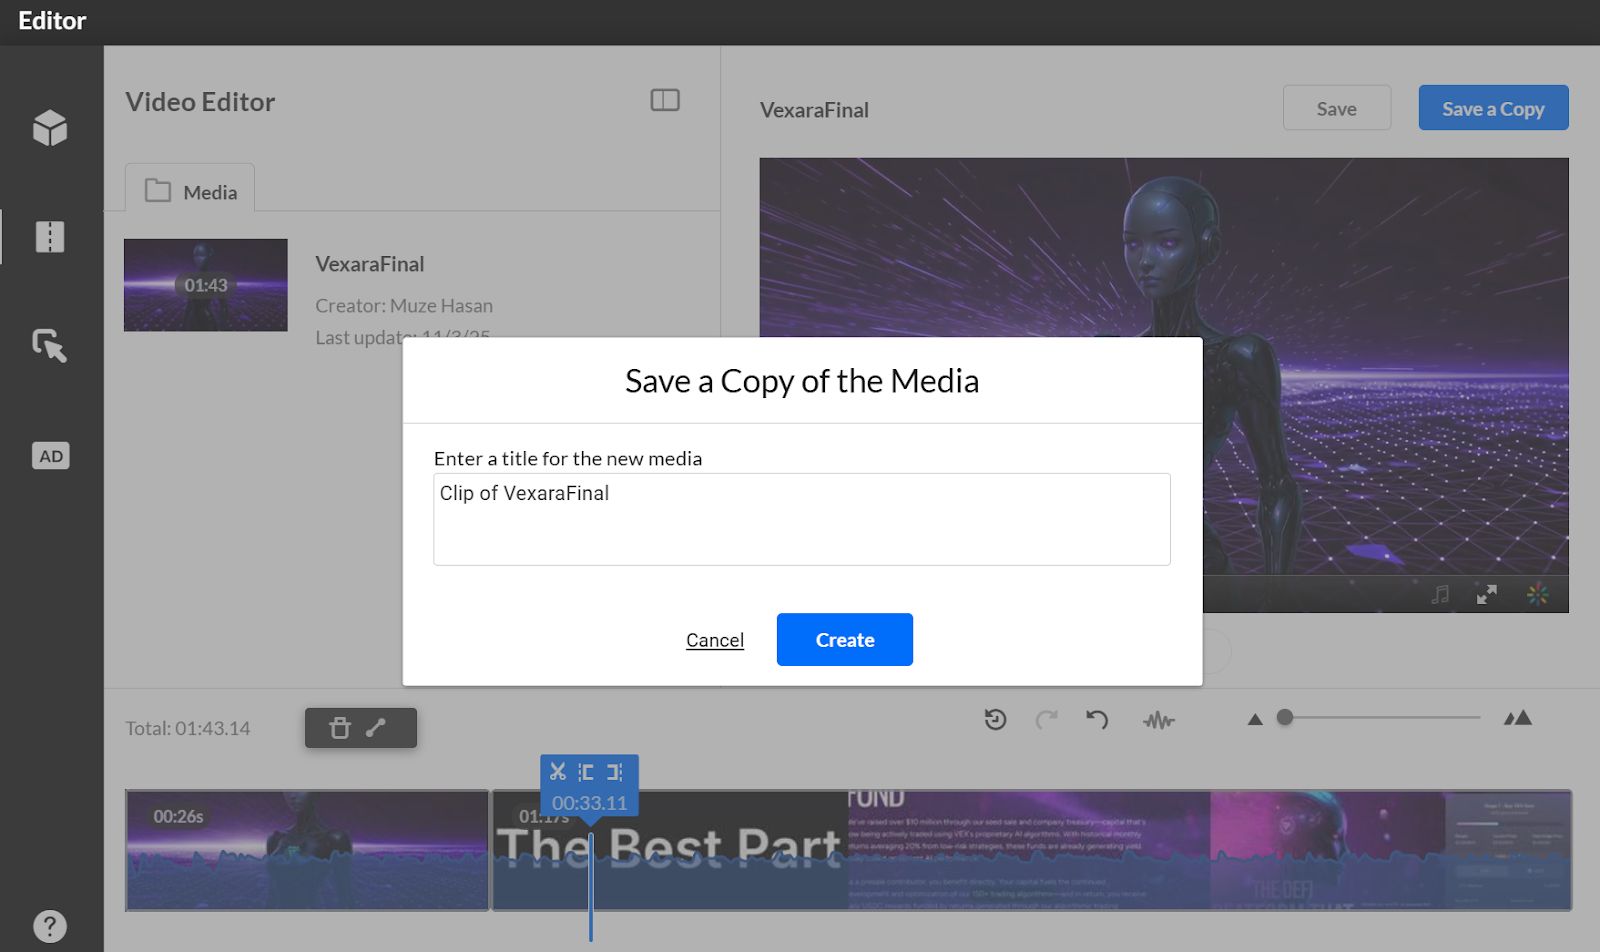
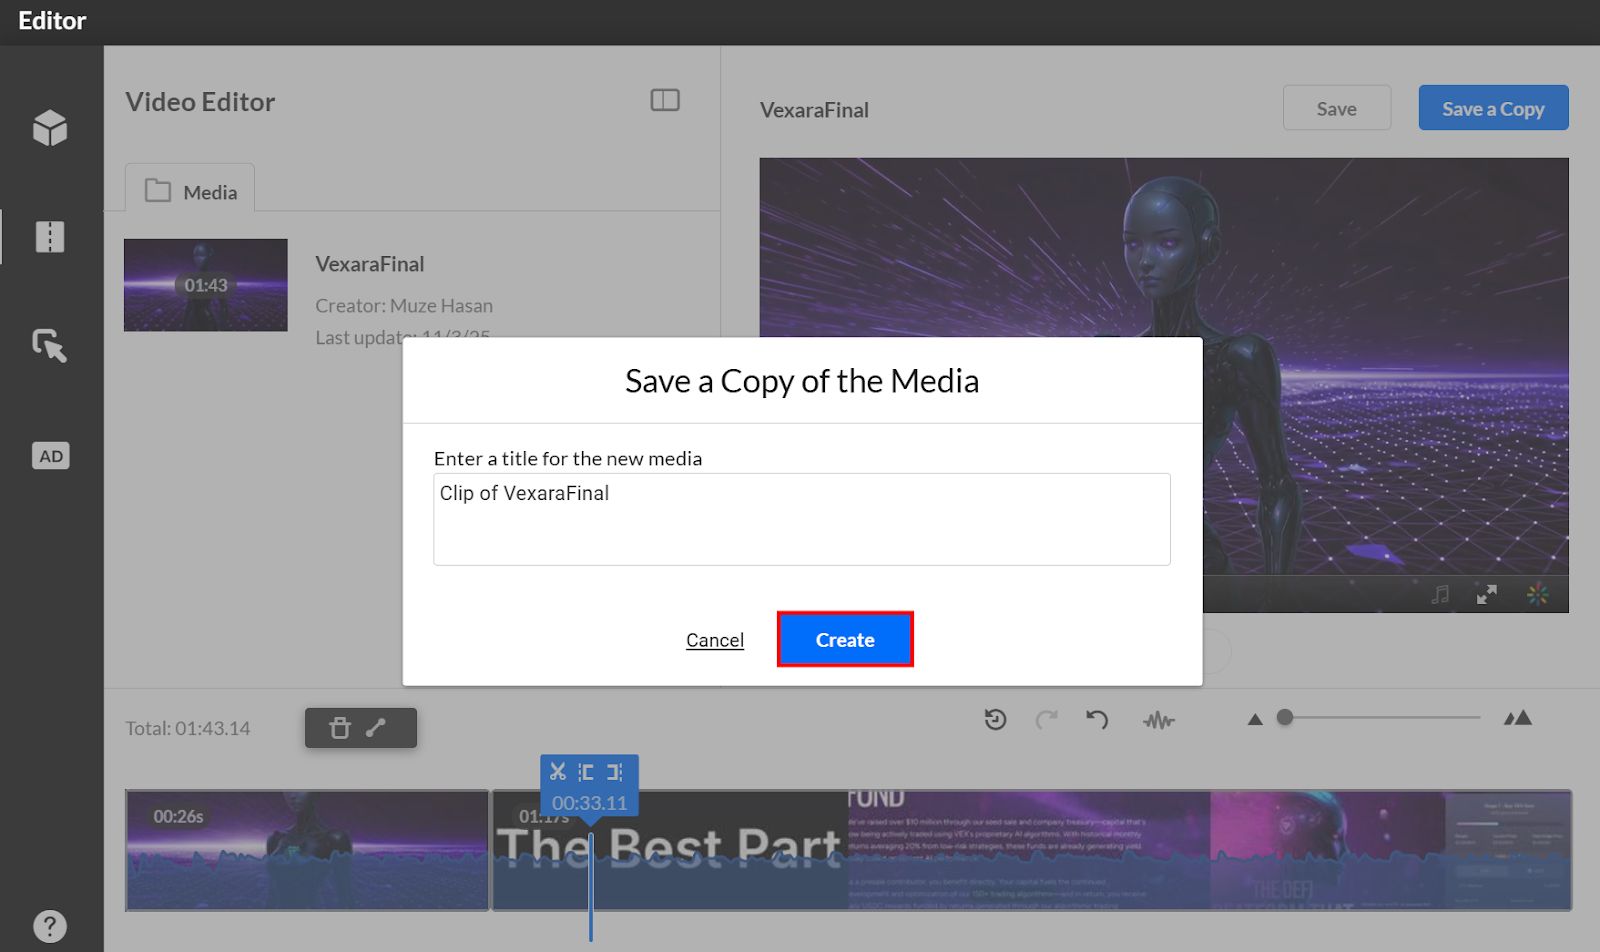
Step 5: Click on the “Create” button.
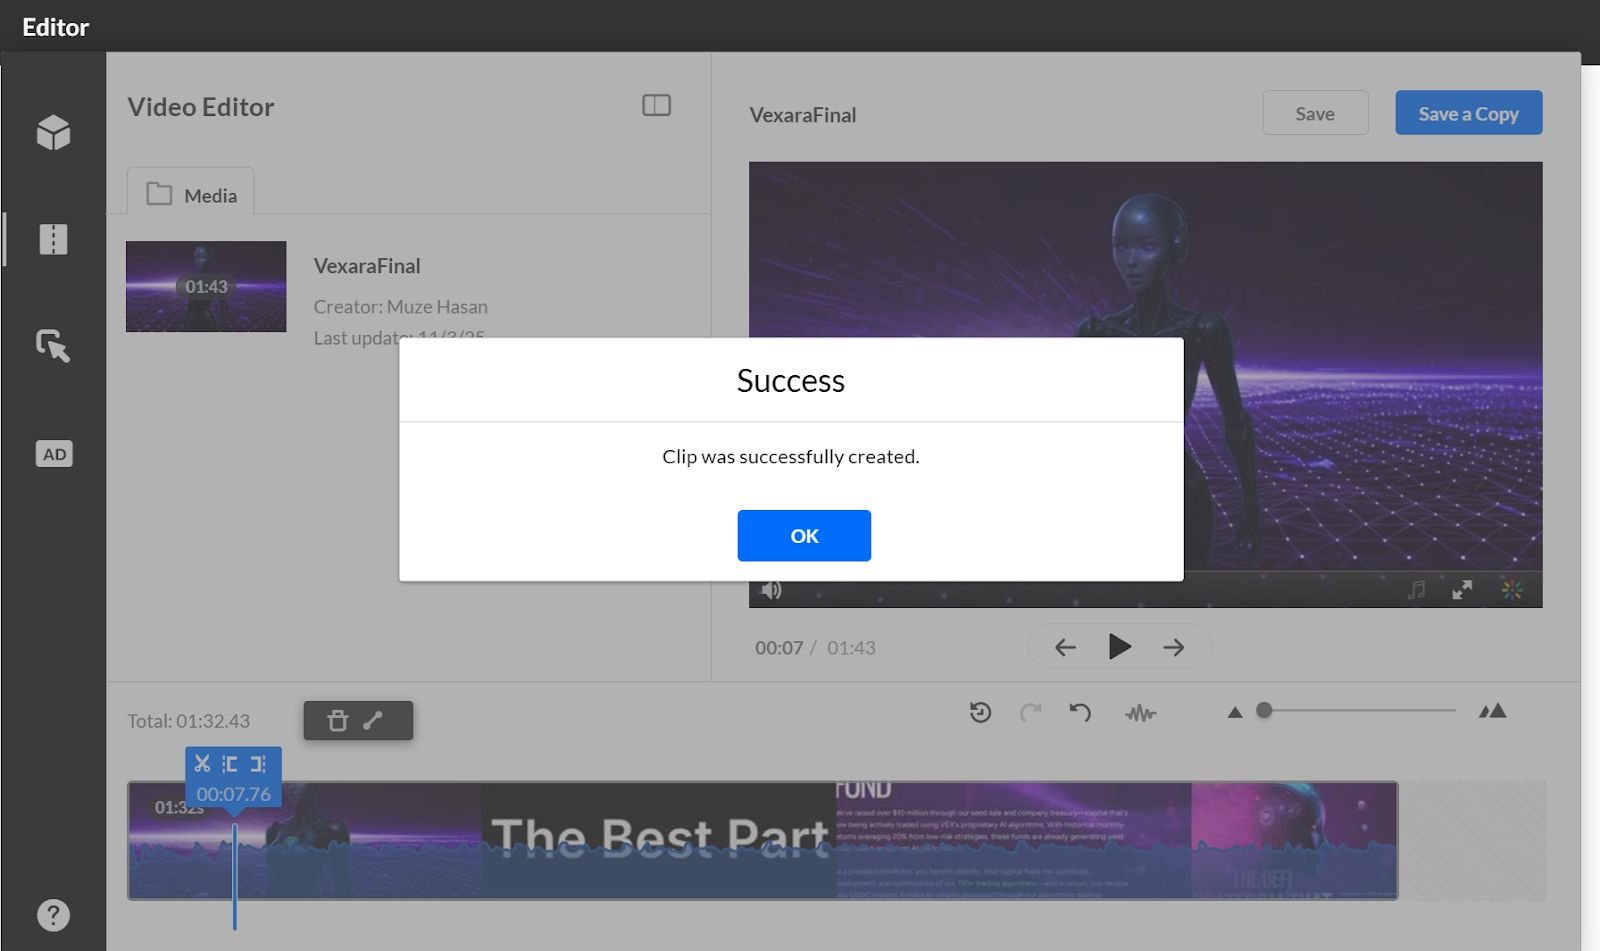
Step 6: A confirmation message appears once the new clip is saved in My Media.
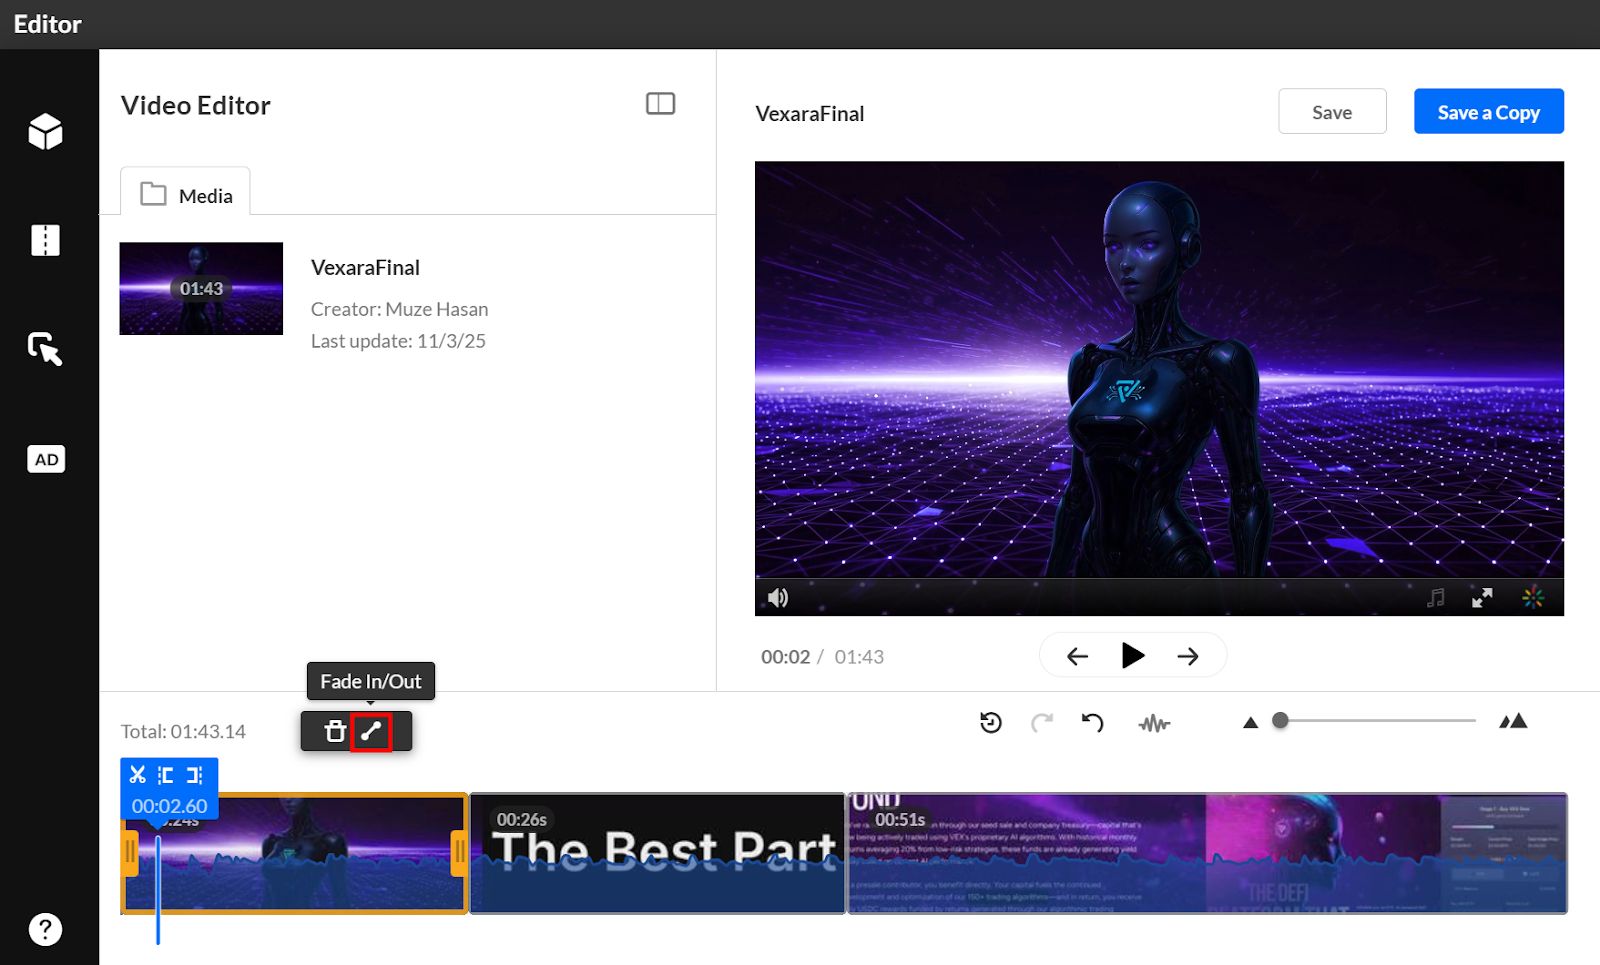
Adding Fade Effects
Fade effects create smooth transitions between scenes or at the start/end of a video.
Step 1: Select the desired video segment.
Step 2: Click the Fade In/Out icon.
Step 3: Enter fade durations in seconds.
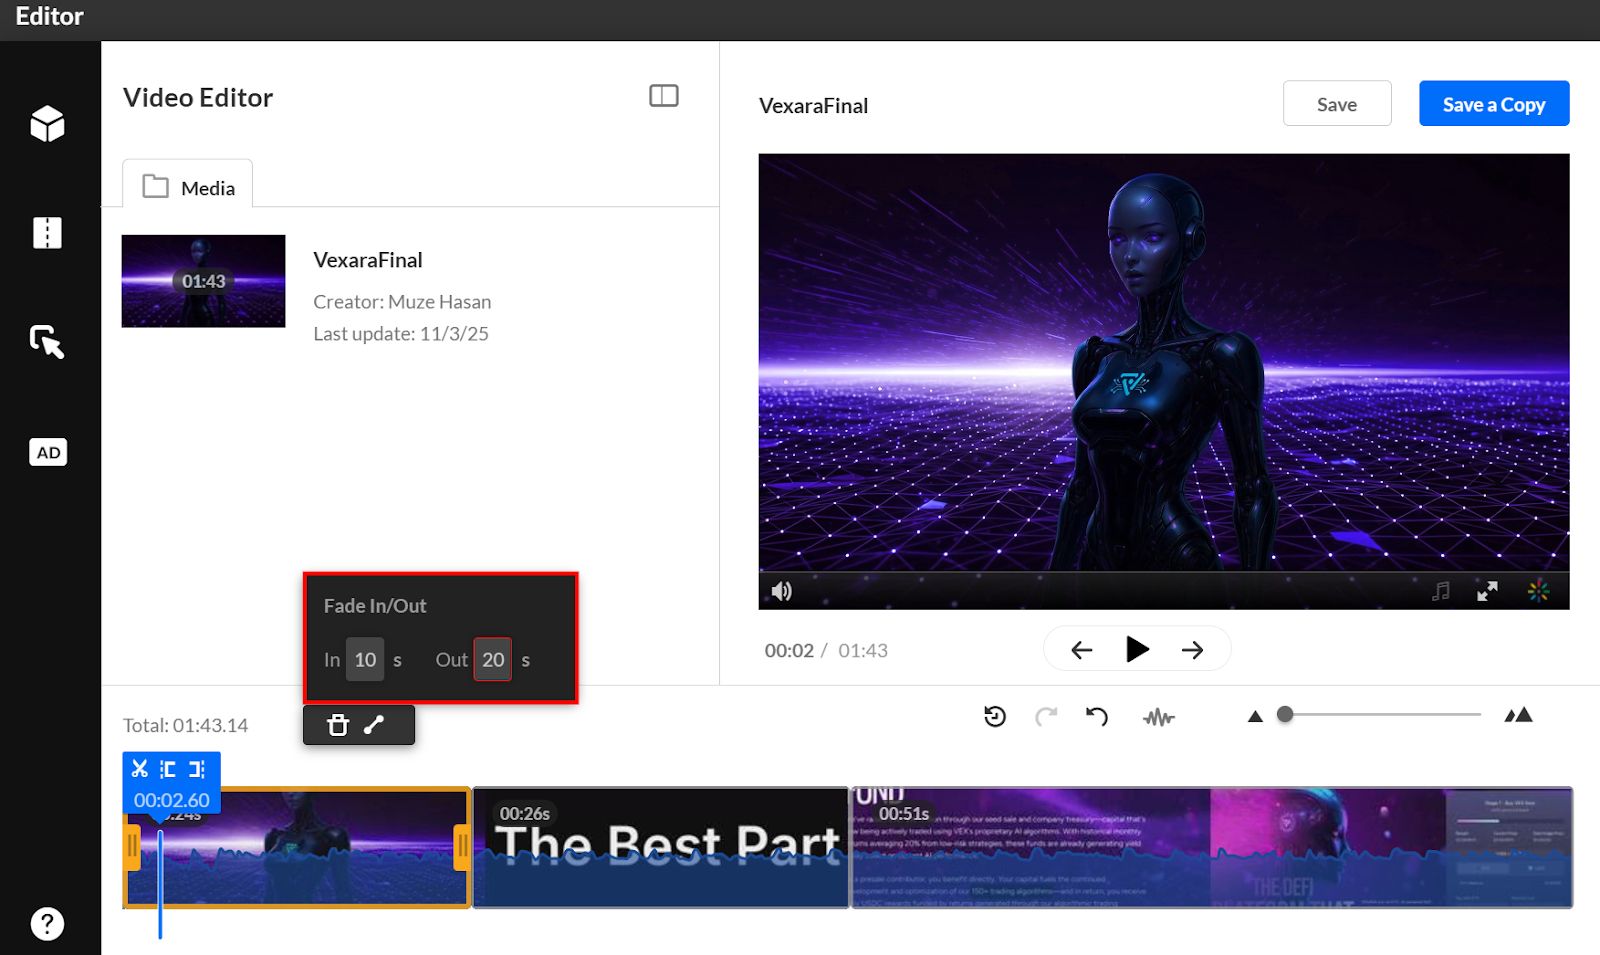
Step 4: Press Enter or click outside the dialog to confirm.
Step 5: Fade markers will appear on the timeline to indicate fade positions.